Customize the Widget Templates
Take full control of your chat widget — edit any of the 15 visual slots (product cards, message bubbles, modals, header, CSS) with the built-in template editor.
What slot templates are
Every theme in Upsellic is built from 15 independent slot templates. Each slot defines one visual fragment of the widget — for example, the product card shown when the AI recommends a product, or the rating modal that appears when a customer closes the chat. Slots are written in Nunjucks (a template language similar to Twig, Handlebars or Jinja) and a single STYLES slot holds all the CSS that wires the layout together.
This means every part of the widget that the visitor sees is editable, per merchant, per theme. You can match the chat to your store's visual design in every detail — colors, typography, spacing, button shapes, card layouts — without any work on our end and without breaking any other merchant's widget.
The 15 slots
| Slot | What it renders |
|---|---|
PRODUCT_CARD | Product recommendation card inside the assistant message |
CONTENT_CARD | Article / content recommendation card |
ORDER_CARD | Order tracking card with status and shipping link |
WELCOME_MESSAGE | Greeting shown when the chat opens for the first time |
GOODBYE_MESSAGE | Farewell shown when the conversation ends |
HEADER | Top bar of the widget (title, subtitle, controls) |
FOOTER | Bottom branding strip below the input |
QUANTITY_TIERS | Quantity pricing block for the product |
MESSAGE_USER | Customer message bubble |
MESSAGE_ASSISTANT | Assistant message bubble |
PRODUCT_MODAL | Full product detail popup opened when the customer taps a card |
RATING_MODAL | Conversation rating popup with sentiment buttons |
HANDOFF_UI | Live agent handoff prompts (waiting / connected / fallback channels) |
STYLES | The complete CSS bundle for the theme |
Slots reference shared variables — theme.primaryColour, phrases.viewProduct, product.salePrice, etc. — so even when you rewrite the markup, the widget still wires up to product data, color settings, and translations automatically.
System themes vs custom themes
Upsellic ships with system themes (default, minimal, editorial) — these are the defaults and are read-only by design, so updates we ship don't accidentally overwrite anyone's customizations. To customize a widget, you first clone one of the system themes into a private custom theme that belongs to your account. From that point on, the theme is yours to edit freely.
Clone a system theme
Before you can edit any template, you need a custom theme — a copy of a system theme that exists only in your account.
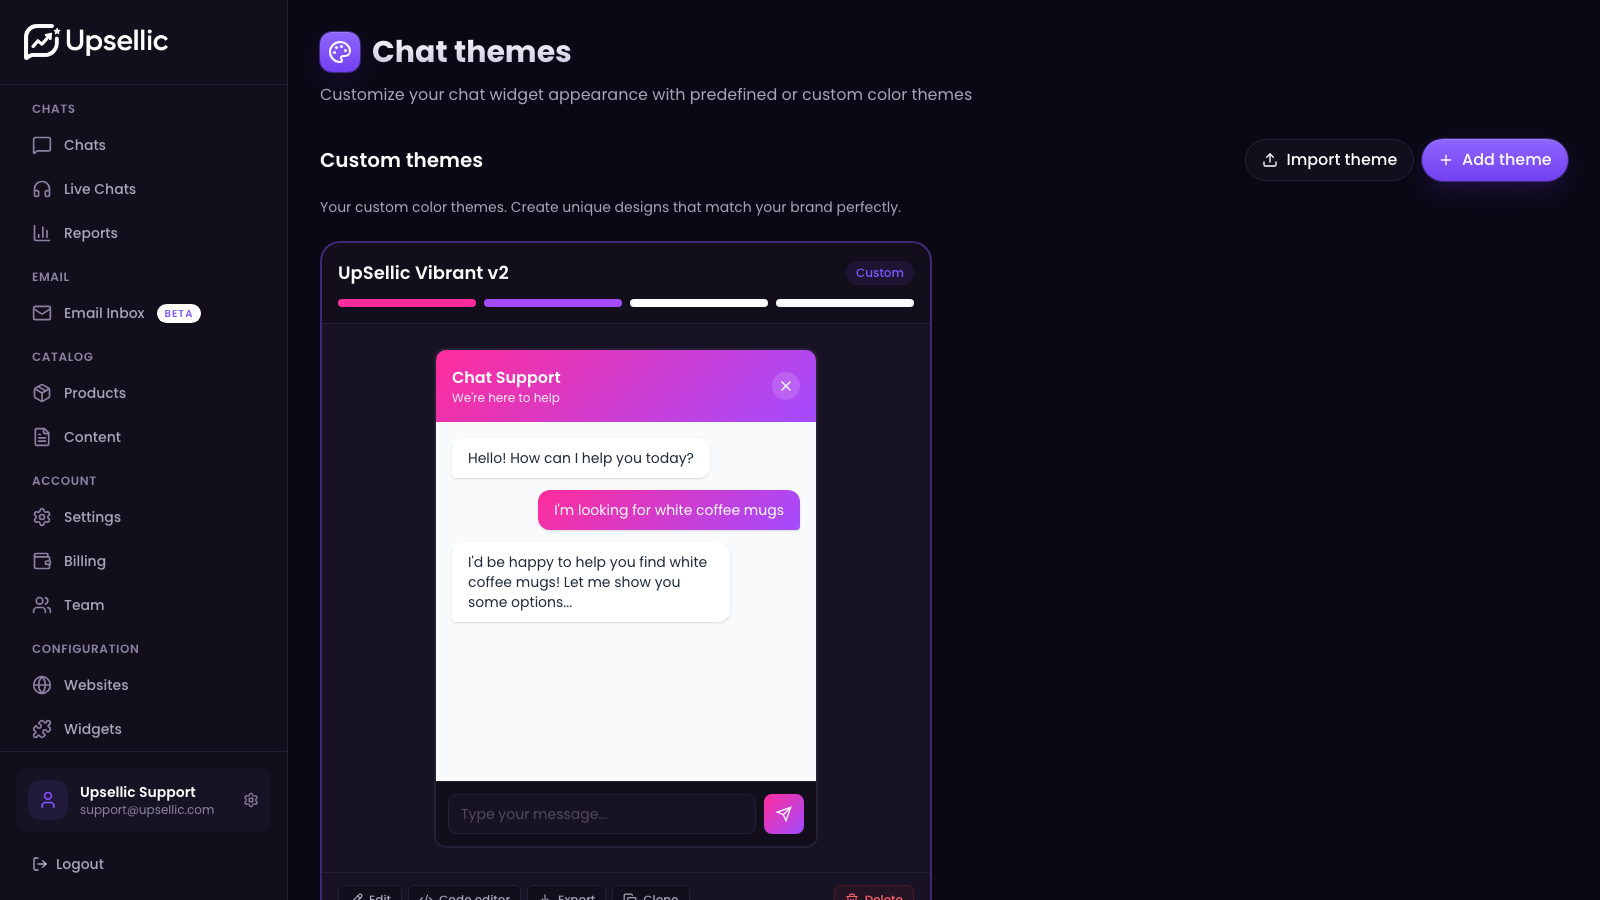
Open the themes list
In the dashboard sidebar, click Themes. You'll see all available themes — system themes are marked separately from custom themes you've created previously.

Click "Clone" on the system theme you want to copy as a starting point
A modal appears asking for the name of your new theme. Pick a name that reflects the brand or purpose (e.g. Holiday Edition, NL Shop, Mobile-first).
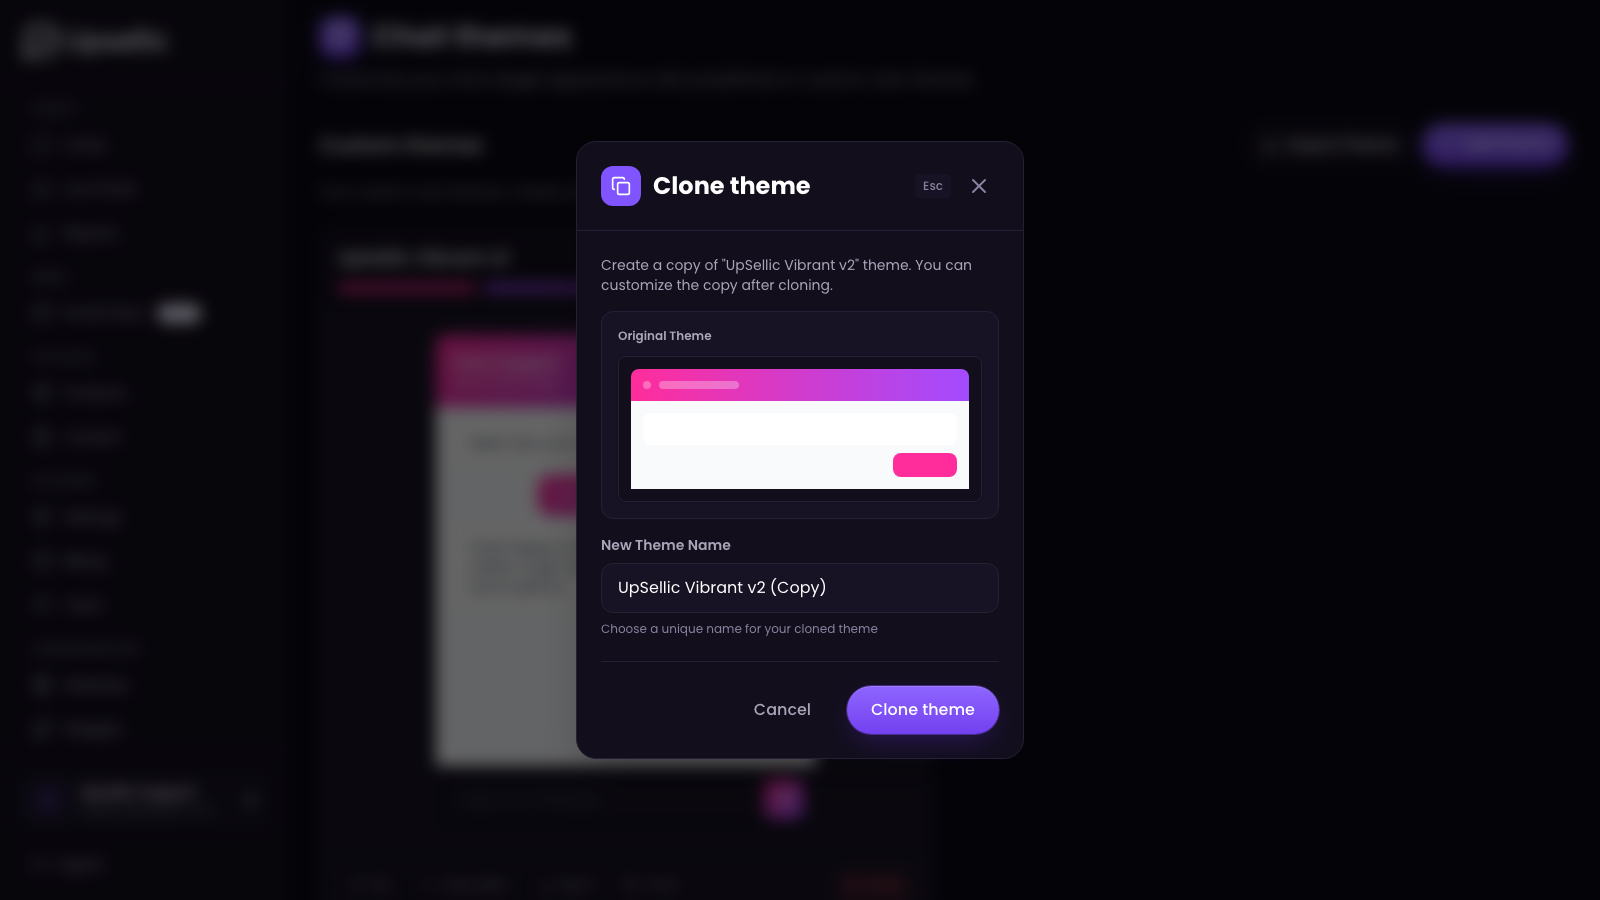
After confirming, the new custom theme appears in the list with all 15 slots pre-filled from the system theme you cloned. Colors are also copied — but everything is now editable.
The system theme you cloned from stays unchanged and continues to be available as a "Compare with source" reference inside the editor — useful when you want to see exactly what you've changed.
Edit a slot
Open the template editor
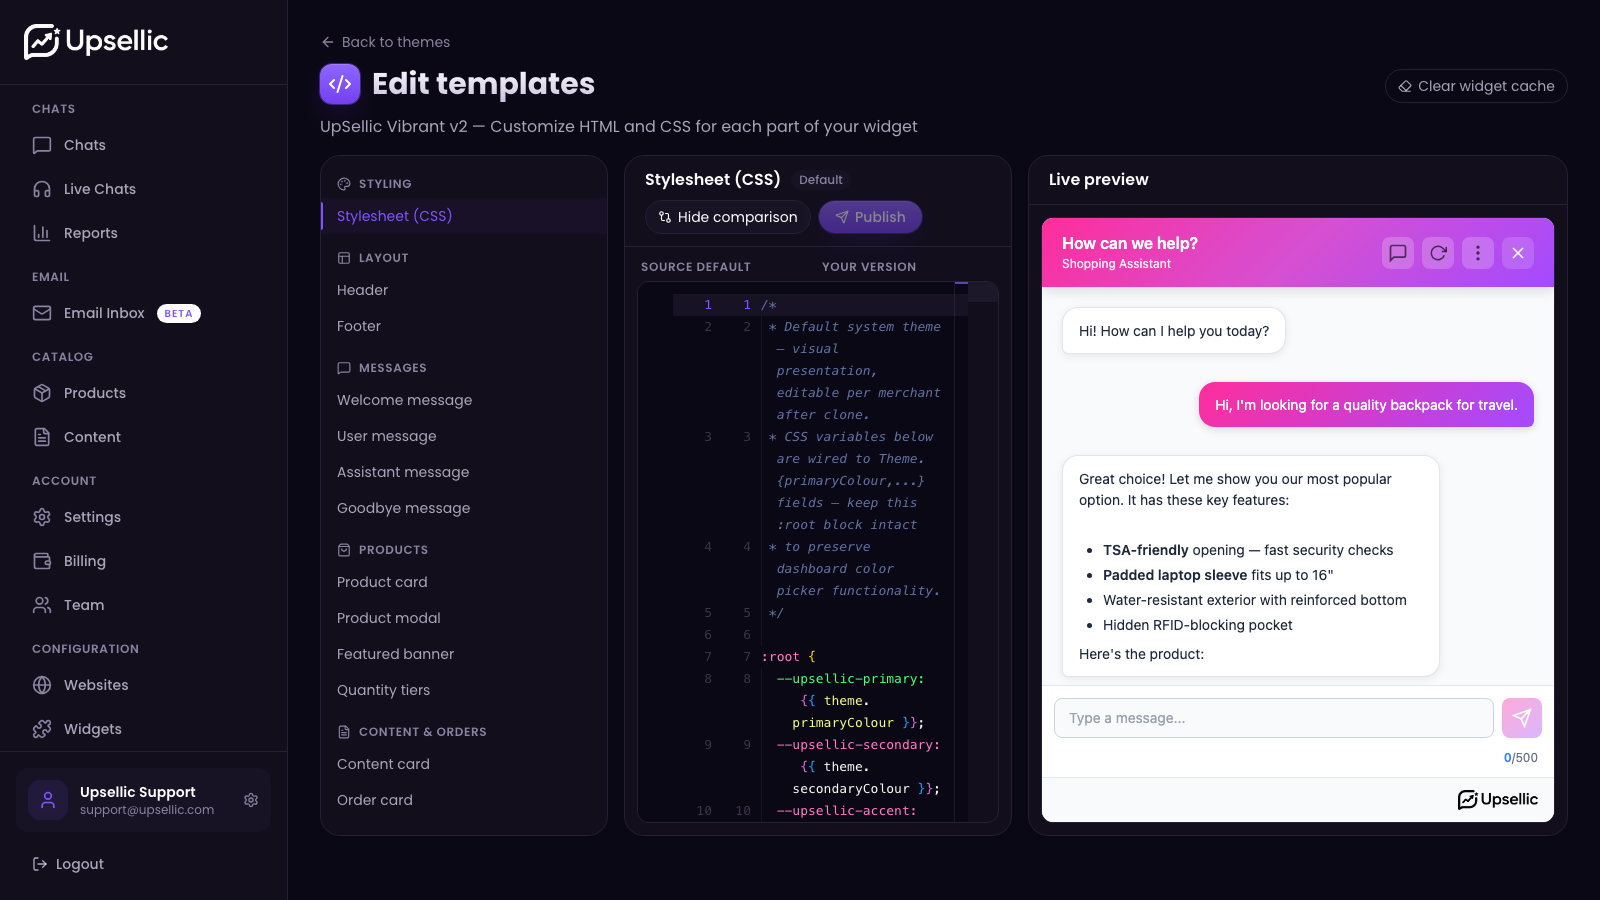
On any custom theme card, click the Code editor button. The editor lists all 15 slots on the left, the Monaco code editor in the main area, and a live preview pane on the right that renders the widget from the current draft.

Pick a slot to edit
Click any slot name in the sidebar — the editor loads that slot's content and the preview re-renders. The active slot is highlighted, and slots with unsaved drafts (more on that next) are marked so you can see what's been modified.
Make your changes
The editor is full-blown Monaco (the same engine that powers VS Code), with syntax highlighting for HTML / Nunjucks (in slot templates) and CSS (in the STYLES slot). Bracket matching, line numbers, multi-cursor, find & replace, keyboard shortcuts — every feature you need to edit code.
Every keystroke is auto-saved as a draft. Drafts are private to the editor and have zero effect on the production widget — your customers keep seeing the previously published version until you hit Publish.
Use the live preview
The preview pane on the right re-renders the widget every time the draft updates. It uses sample product / content / order data so you can see how cards, bubbles, modals and prices look without sending real chats. Click on a product card in the preview to verify the modal you just edited.
Publish your changes
Drafts let you experiment safely. To publish your changes, the workflow is:
Compare with source
Click Compare with source on the edited slot. The editor switches to a side-by-side diff view (Monaco's built-in diff editor) showing the original system template on the left and your draft on the right. Every difference is highlighted line-by-line, so you can review exactly what will change before going live.
Publish a single slot — or all of them at once
Hit Publish to push the active slot's draft to production. Or click Publish all in the toolbar to publish every slot that has unsaved changes — this also clears the theme's cache in one go, which is faster when editing many slots.
Publishing emits a theme.updated event internally. The widget bundle for every active widget using this theme is rebuilt and the CDN cache is purged. The next page load on your customers' side will serve the fresh version.
Discard or reset if something goes wrong
- Discard draft — reverts the slot's draft back to whatever is currently published, rolling back any unpublished changes.
- Reset — reloads the slot from the original system template (the one this theme was cloned from). Useful when you want to start editing the slot from scratch.
Clear the widget cache
Most of the time you don't need to clear the cache manually — publishing a slot already does it automatically. For the rare cases when you want to force a rebuild, the editor toolbar has a Clear widget cache button.

The button purges both the in-memory bundle cache on our API and the CDN cache for every active widget using this theme. The next request rebuilds the bundle from the current published templates.
Export and import themes
Themes are portable — you can export an entire custom theme (colors + all 15 slots, drafts and published, in a single JSON file) and import it back later, on the same account or on another one.
Export
On any custom theme card, click Export. A JSON file downloads to your computer with a name like MyTheme.2026-05-01T12-34-56.theme.json. Keep it somewhere safe — it's a complete snapshot of the theme.
System themes can't be exported directly. Clone the system theme first, then export the cloned theme.
Import
Click Import theme in the toolbar at the top of the themes list and pick a JSON file. The imported theme always lands as a new custom theme — its name is the original name suffixed with the import timestamp, e.g. MyTheme (import 2026-05-01 14:22:08).
Importing never overwrites an existing theme. This means you can:
- Roll back a customization by importing an older snapshot — the previous version comes in as a brand new theme that you set in the widget edit settings.
- Experiment — import a snapshot, customize it without touching the original, run A/B tests by switching the widget's theme.
To make an imported theme live for a widget, go to Widgets, edit the widget you want to update, and pick the imported theme from the theme list. The switch is instant — the next page load on customers' devices serves the new theme.