Custom XML Product Feed
Import products from any XML feed format. Configure field mapping, default values, and optional page scraping for richer descriptions.
Creating the Feed
The Custom XML feed type allows you to import products from any XML structure — whether it's your own proprietary format, a marketplace export, or a third-party tool output.
Go to the Feeds section
In the sidebar menu, click Feeds, then click "Add new feed".
Select feed type
Enter a name for the feed (e.g. "Products — Custom XML"), select your website, and paste the URL to your XML file. Then choose Custom XML as the feed type.
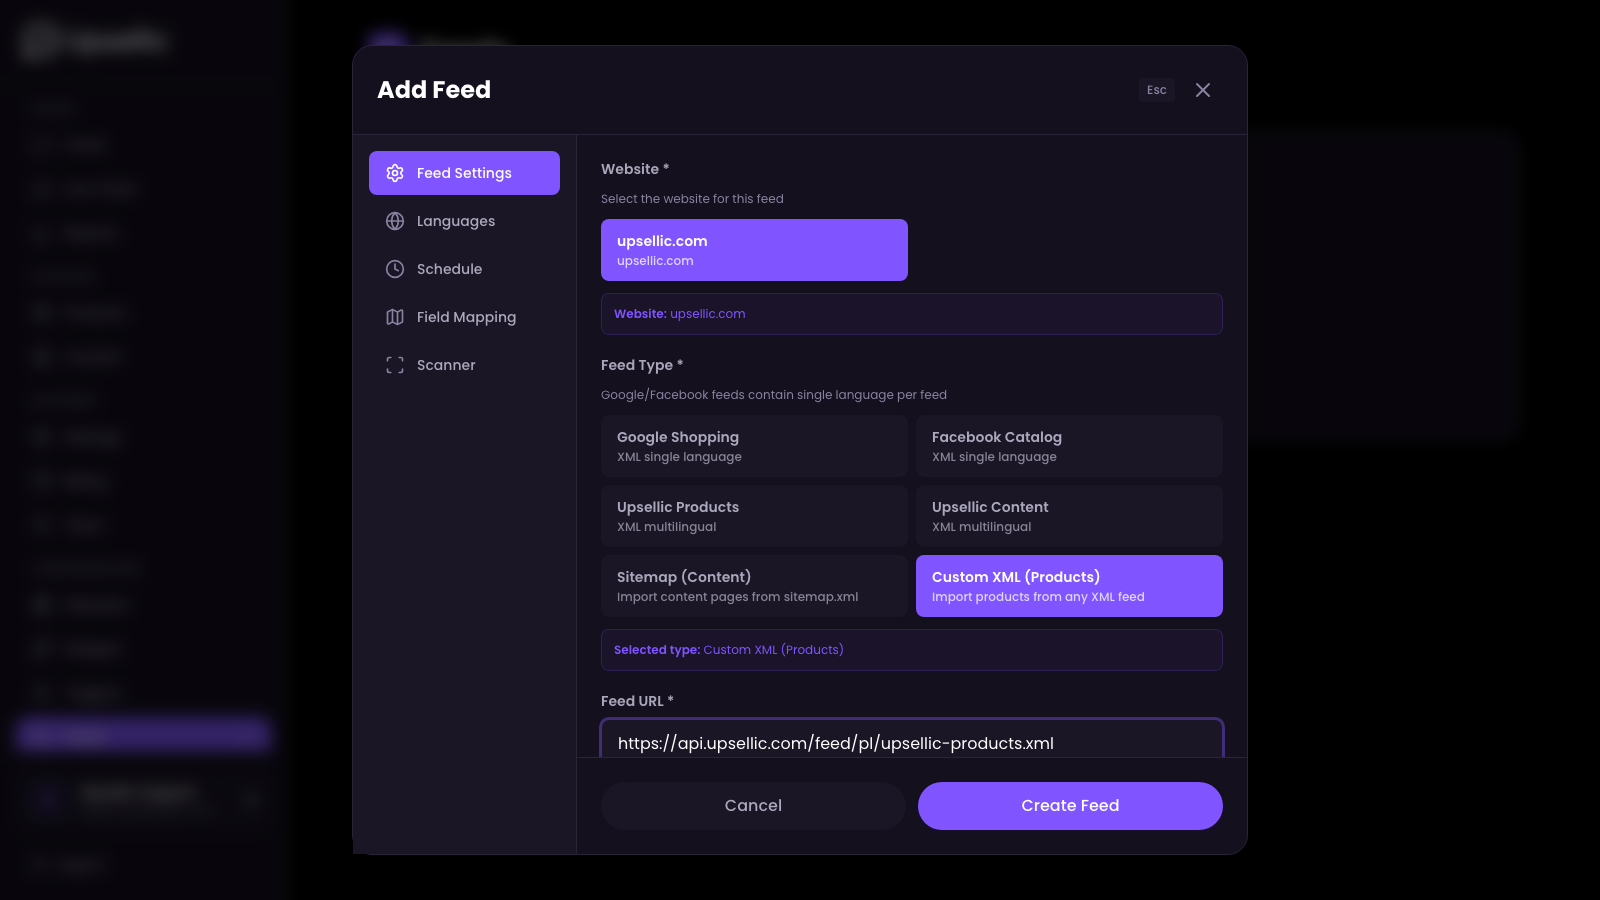
The feed URL must point to a publicly accessible XML file. If your feed requires authentication, make sure the URL includes the necessary API key or token as a query parameter.
Field Mapping
Field mapping tells Upsellic how to read your XML structure. Instead of configuring everything manually, you can let AI detect and map the fields automatically.
Open the Field Mapping tab
Switch to the Field Mapping tab. Initially, all fields will be empty — Upsellic doesn't yet know the structure of your XML.
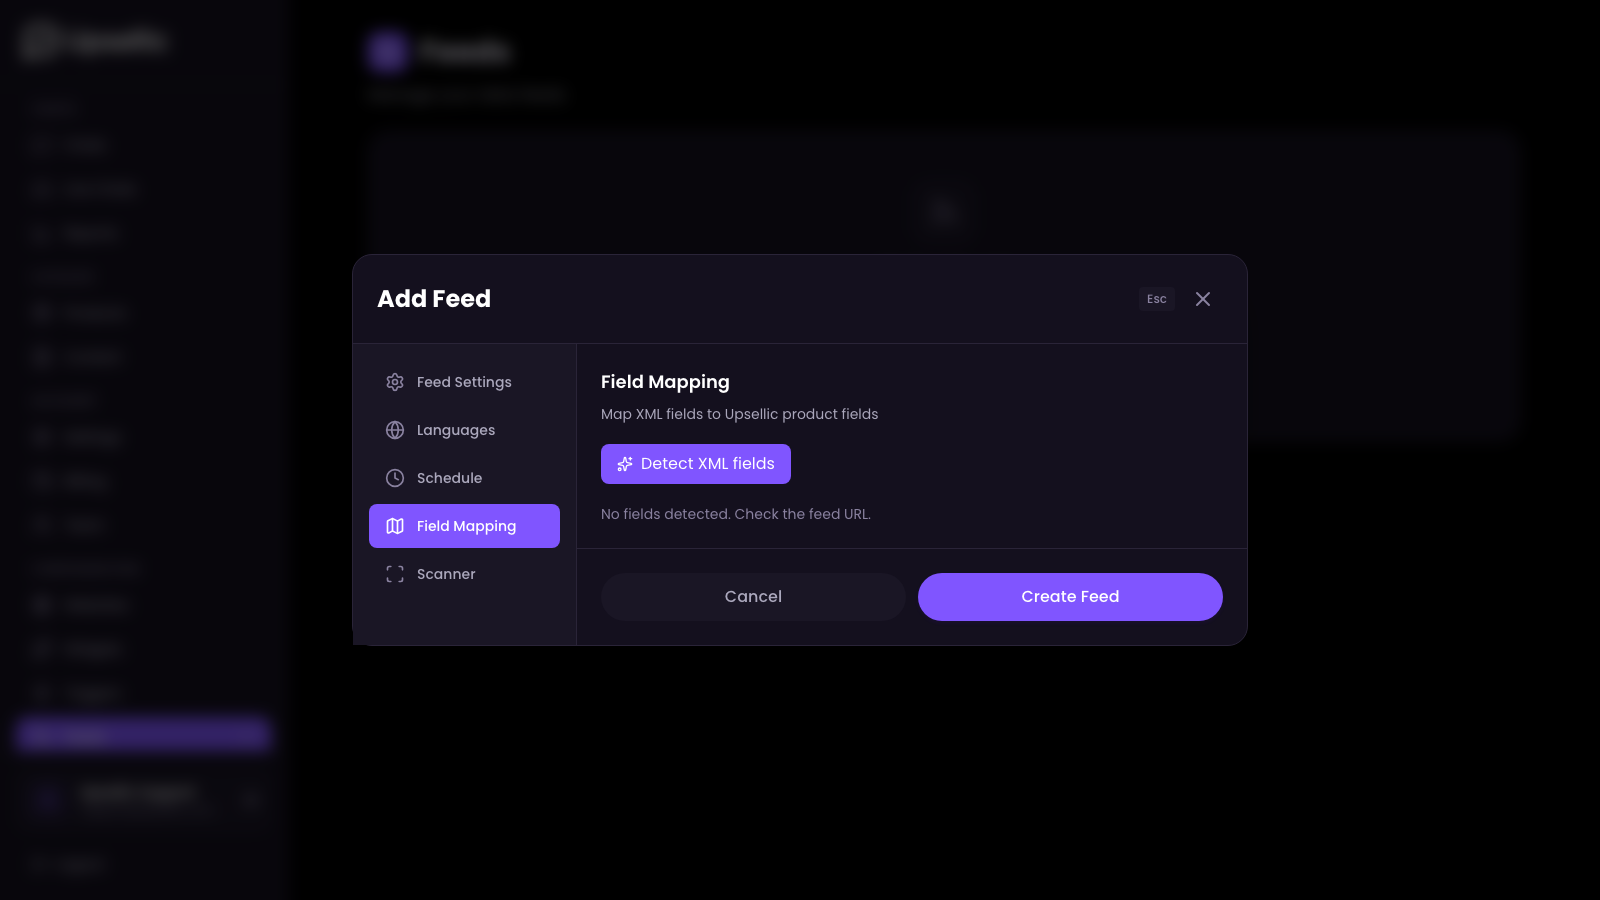
Click "Detect XML fields"
Click the "Detect XML fields" button. Upsellic will download a sample of your feed, analyze the XML structure, and automatically map detected fields to the corresponding product attributes.

Review and adjust the mapping
After detection, review the auto-mapped fields and adjust them if needed. Fields are divided into two groups:
Required fields — the import will not work without these:
- id — unique product identifier
- title — product name
- description — product description
- link — URL to the product page
- imageUrl — URL to the main product image
- price — product price (numeric value)
- currency — price currency code (e.g. EUR, PLN, USD)
- availability — stock status (e.g. "in stock", "out of stock")
Optional fields — provide these for richer product data:
- sku — stock keeping unit
- gtin — global trade item number (EAN, UPC, ISBN)
- brand — manufacturer or brand name
- category — product category path
- salePrice — discounted price
- stockQuantity — exact number of items in stock
- active — whether the product is active/published
Set default values
For fields that are not present in your XML, you can set a fixed default value. This is useful when all products in the feed share the same attribute — for example, if your entire catalog uses one currency:
- Set currency to
EURif all prices are in euros - Set availability to
in stockif your feed only contains available products - Set brand to your brand name if you sell only your own products
How the "active" field works
The active field has special behavior. If it is neither mapped to an XML field nor given a default value, Upsellic will automatically check each product URL for a 404 response. Products that return a 404 are marked as inactive and excluded from AI recommendations.
If your XML feed contains all required fields, the auto-detection usually maps everything correctly on the first try. You only need to adjust mappings for unusual or nested XML structures.
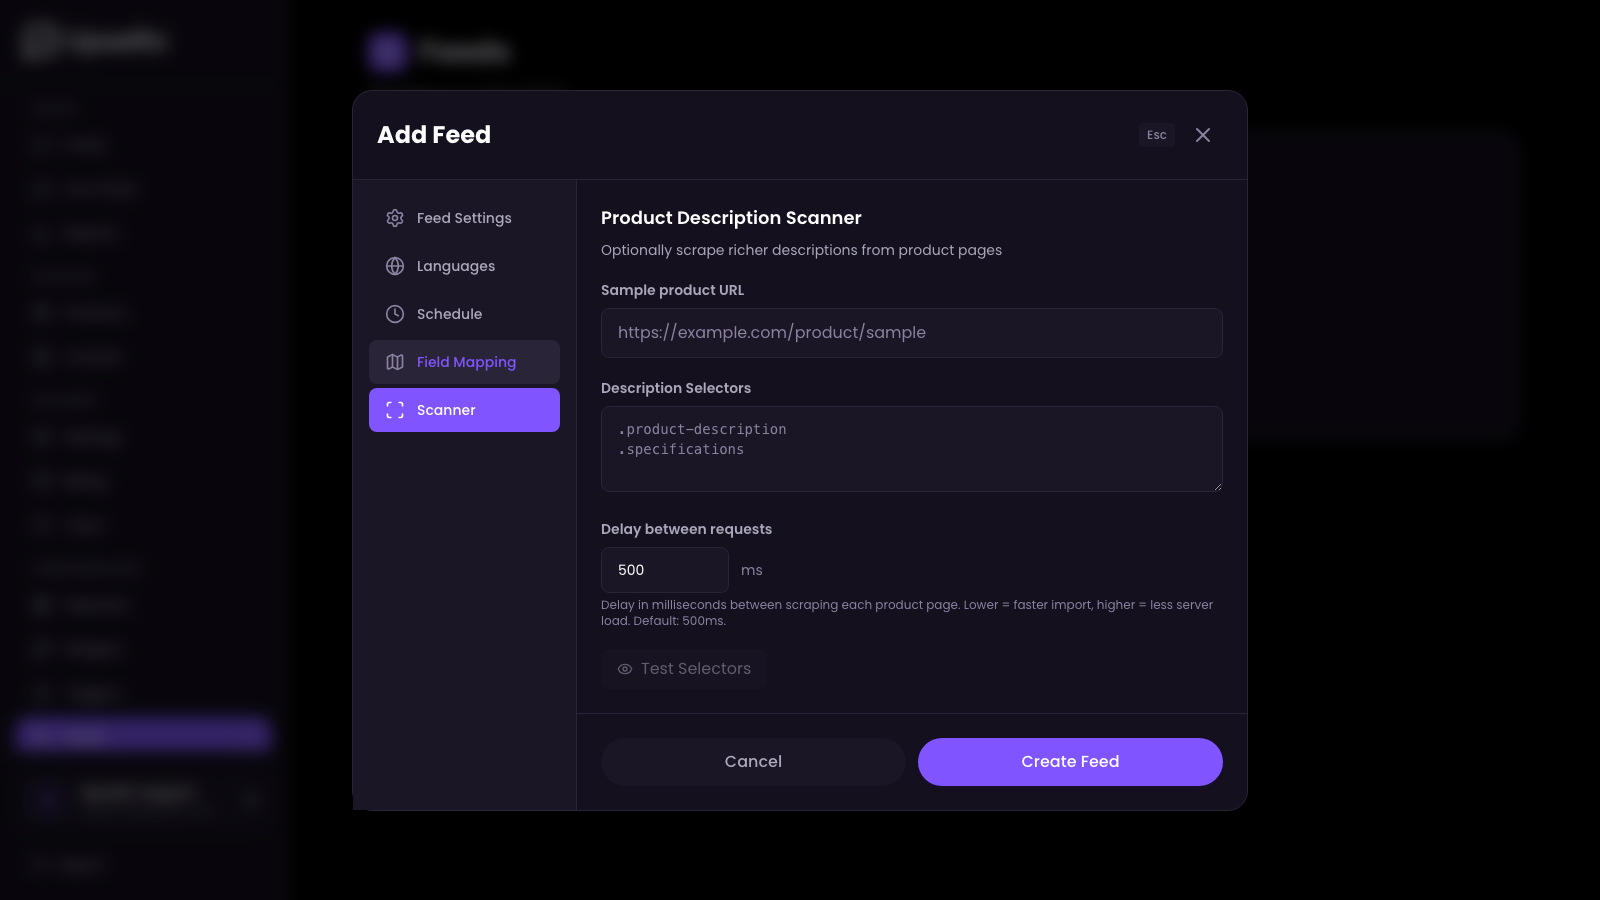
Description Scanner
If your XML feed contains only short or incomplete product descriptions, you can use the built-in scanner to scrape richer descriptions directly from your product pages.
Open the Scanner tab
Switch to the Scanner tab. This feature is entirely optional — only use it if you want to replace or supplement the descriptions from your XML.
Configure the scanner
- Sample product URL — paste a URL to one of your product pages so Upsellic can analyze its structure
- CSS selectors — define which HTML elements contain the product description (e.g.
.product-description,#tab-description) - Delay between requests — set the wait time between page requests (100-5000ms) to avoid overloading your server
If your XML feed already contains detailed, high-quality descriptions, you can skip the scanner entirely. The AI works best with rich, descriptive text — but the source doesn't matter.
Language & Schedule
Select the source language
In the Languages tab, select the language of the data in your XML feed. During import, Upsellic will automatically translate product content into all languages configured in your store's widgets.
Set the import schedule
In the Schedule tab, configure automatic imports at specific times (GMT). This keeps your product catalog up to date without manual effort.
Each website can have only one product feed per language. If your store operates in multiple languages, create a separate feed for each language version.
Running the Import
Save and start
Click Create feed to save the configuration, then click Run import to start the first import.
Monitor progress
Import progress is displayed in real time. You can see how many products have been processed, the current stage (downloading, parsing, optimizing, translating), and the estimated time remaining.
What to expect
The first import takes longer than subsequent ones because Upsellic needs to:
- Parse and validate every product in the feed
- Generate AI-optimized descriptions and embeddings
- Translate content into all configured languages
- Index products for semantic search
Subsequent imports process only changed products, so they complete much faster.
After a successful import, go to the Products section in the dashboard to verify that your products were imported correctly with all mapped fields.