Roles and permissions: managing team access
Create roles with specific permissions and assign them to team members down to a single website.
In Upsellic you decide exactly who can do what in your organization. Every team member gets one role, and you choose which websites that role applies to. This guide shows you how to create roles, set permissions, and assign them to users.
How roles and permissions work
Access in Upsellic is built on three ideas:
A permission is a single grant in the form module:action. The actions are:
- read: view data in a module
- write: create and edit
- delete: remove data
A role is a named set of permissions (for example "Content Editor") that you assign to members instead of toggling individual grants for each person.
The scope decides where a role applies. Permissions come in two kinds:
- website permissions (marked
SITE): apply to a specific website: products, content, chats, feeds, widgets, themes, integrations, triggers, email inbox, and reports - organization permissions (marked
ORG): apply across the whole organization: websites, team, roles, billing, and organization details
The dashboard adapts to permissions automatically. If someone has no read access to a module, its menu item is hidden; without write, the add and edit buttons disappear; without delete, so do the delete buttons.
Built-in roles
Every organization starts with two standard roles:
Administrator has full access to the organization and all websites, including features added later. The role is locked; it can't be edited or deleted, so nobody can accidentally cut the organization off from management.
Member is the default starting role for new people. It operates assigned websites: read and write for products, content, chats, email inbox and triggers, plus read access to reports, widgets, themes and feeds.
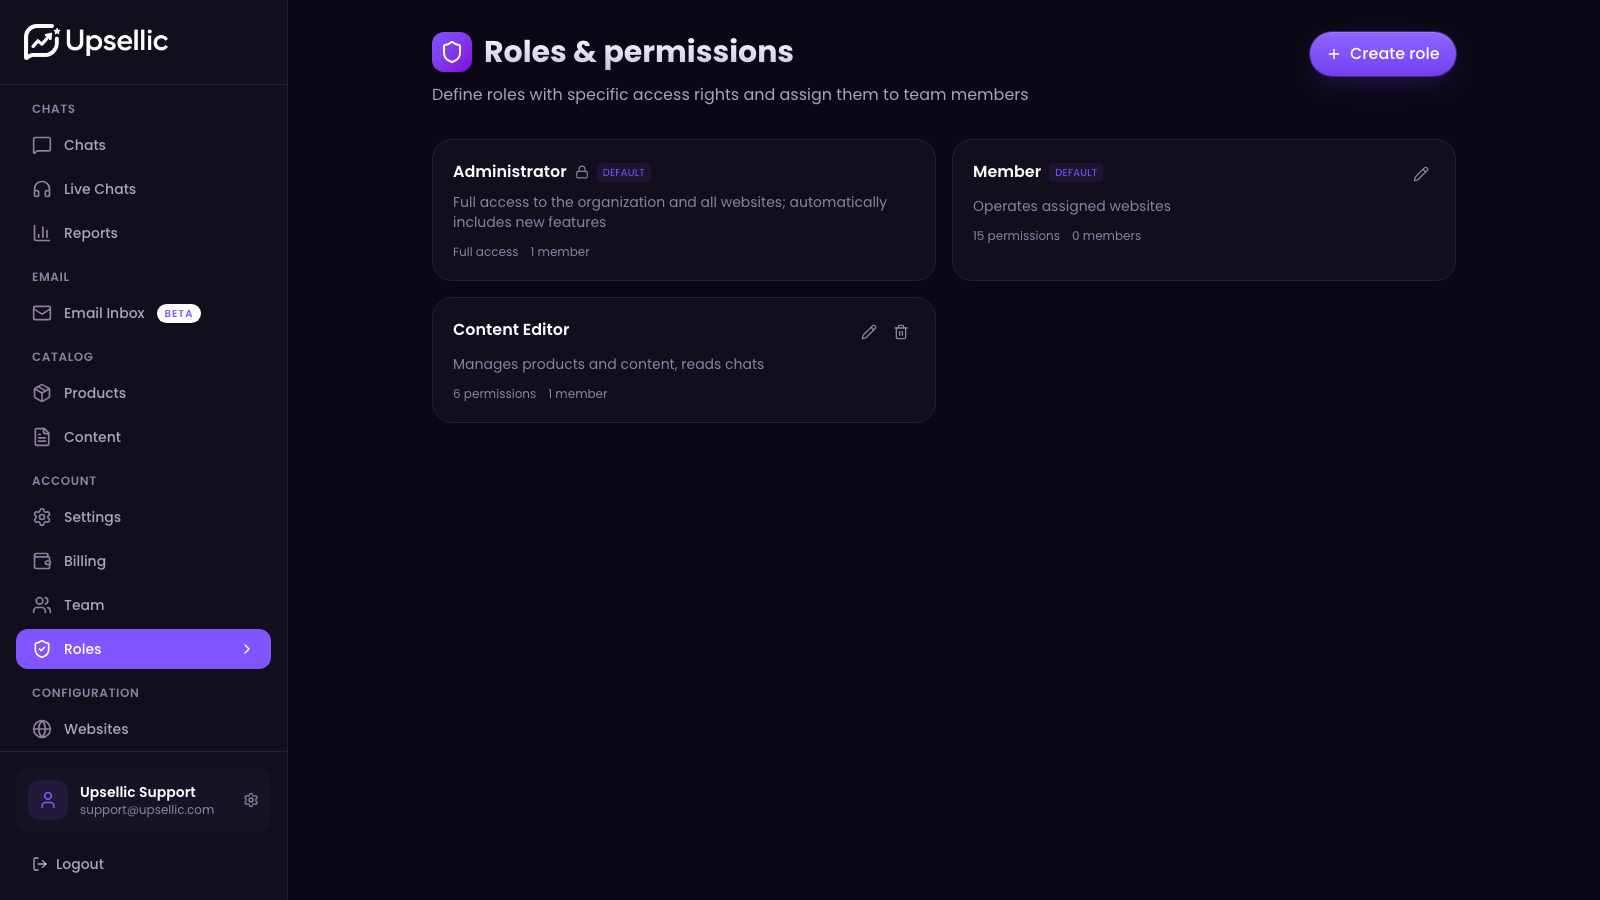
Each role card shows how many permissions it holds and how many members it's assigned to. Roles marked as standard are protected from deletion.
Creating a custom role
Standard roles rarely fit perfectly. Most of the time you'll build your own, like a content editor or a chat support agent.
Open the roles section
In the side menu select Roles, then click Create role in the top-right corner.
Name and describe it
Give it a clear name (such as "Content Editor") and a short description so the rest of the team knows what it's for.
Pick the permissions
For each module, switch on the actions you need: read, write, delete. Read is a prerequisite for write and delete; turn on write and read switches on automatically.
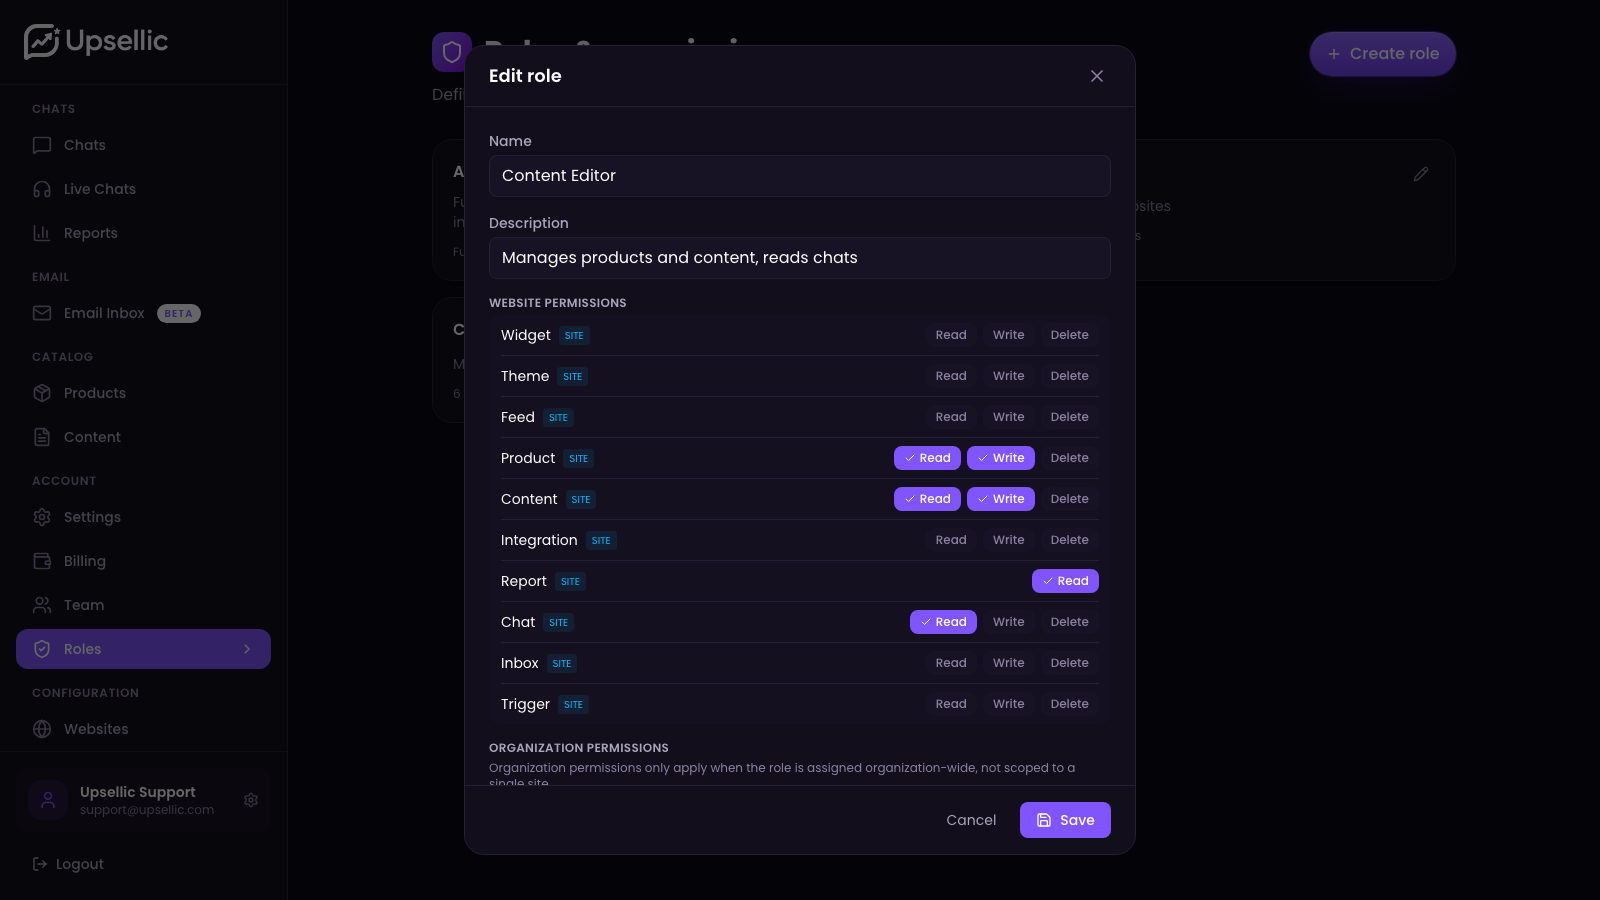
Example: a content editor gets read and write for products and content, read access to reports and chats, but no delete and no access to billing or the team.
Save the role
Click Save. The role appears in the list and is immediately available to assign to team members.
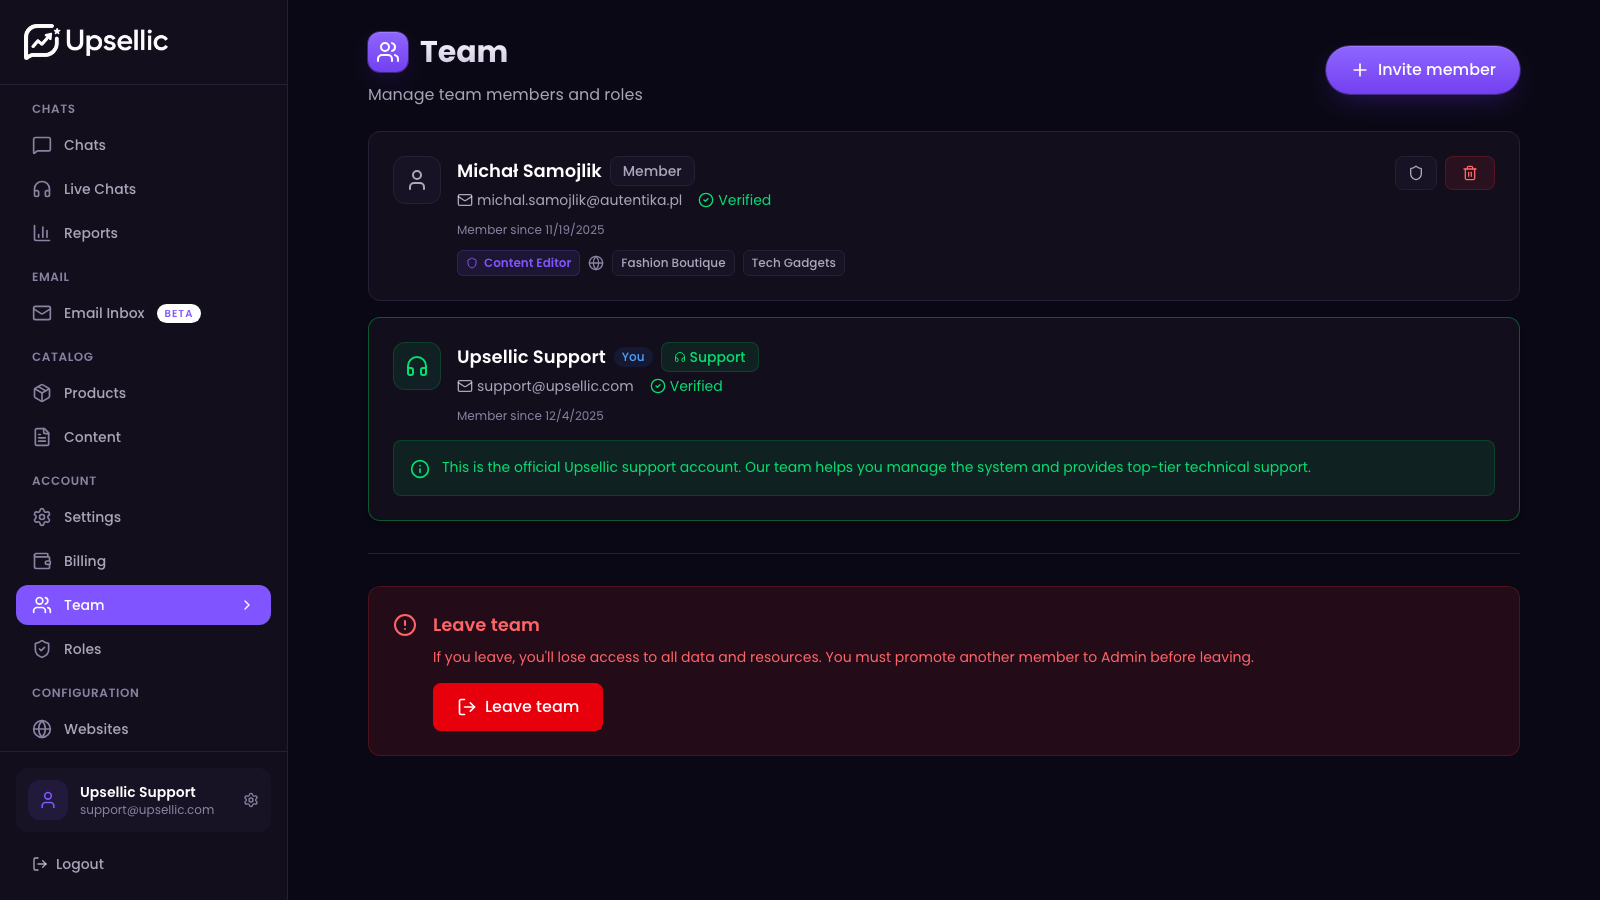
Assigning a role and picking websites
This is the key part: each member has one role and a website scope that the role applies to.
Open the team
Select Team in the menu. You'll see every member with their role and assigned websites.
Open role management
Next to a member, click the shield icon to open the Manage roles window.
Select a role
Choose one role for this member. The description under the dropdown reminds you what the role covers.
Set the website scope
Tick the websites this member should handle. Leaving the selection empty grants access to every website in the organization. The Administrator role is always organization-wide, so the website choice isn't shown for it.
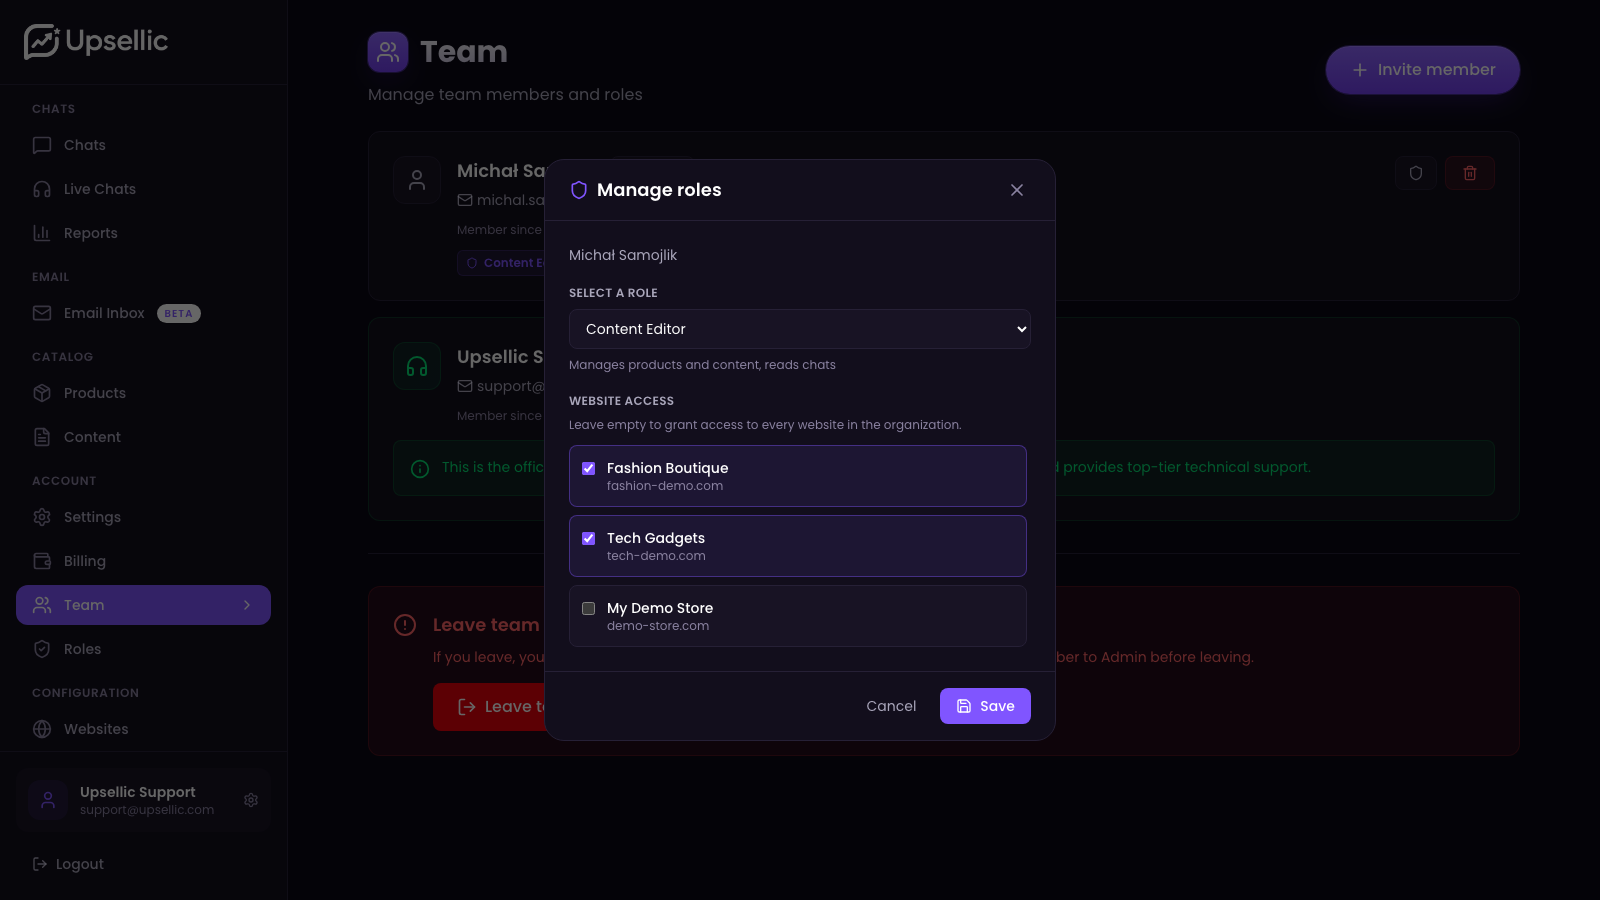
Example: an editor responsible for two shops only gets the "Content Editor" role ticked for those two websites. On every other website their edit buttons simply won't appear.
Save the assignment
Click Save. The change takes effect right away; the next time the member signs in, the dashboard shows exactly what they have access to.
Inviting a new member
You invite new people with a role and website scope already in place.
Send the invitation
In the Team section click Invite member. Enter the email address, choose a role, and tick the websites the invitation should cover.
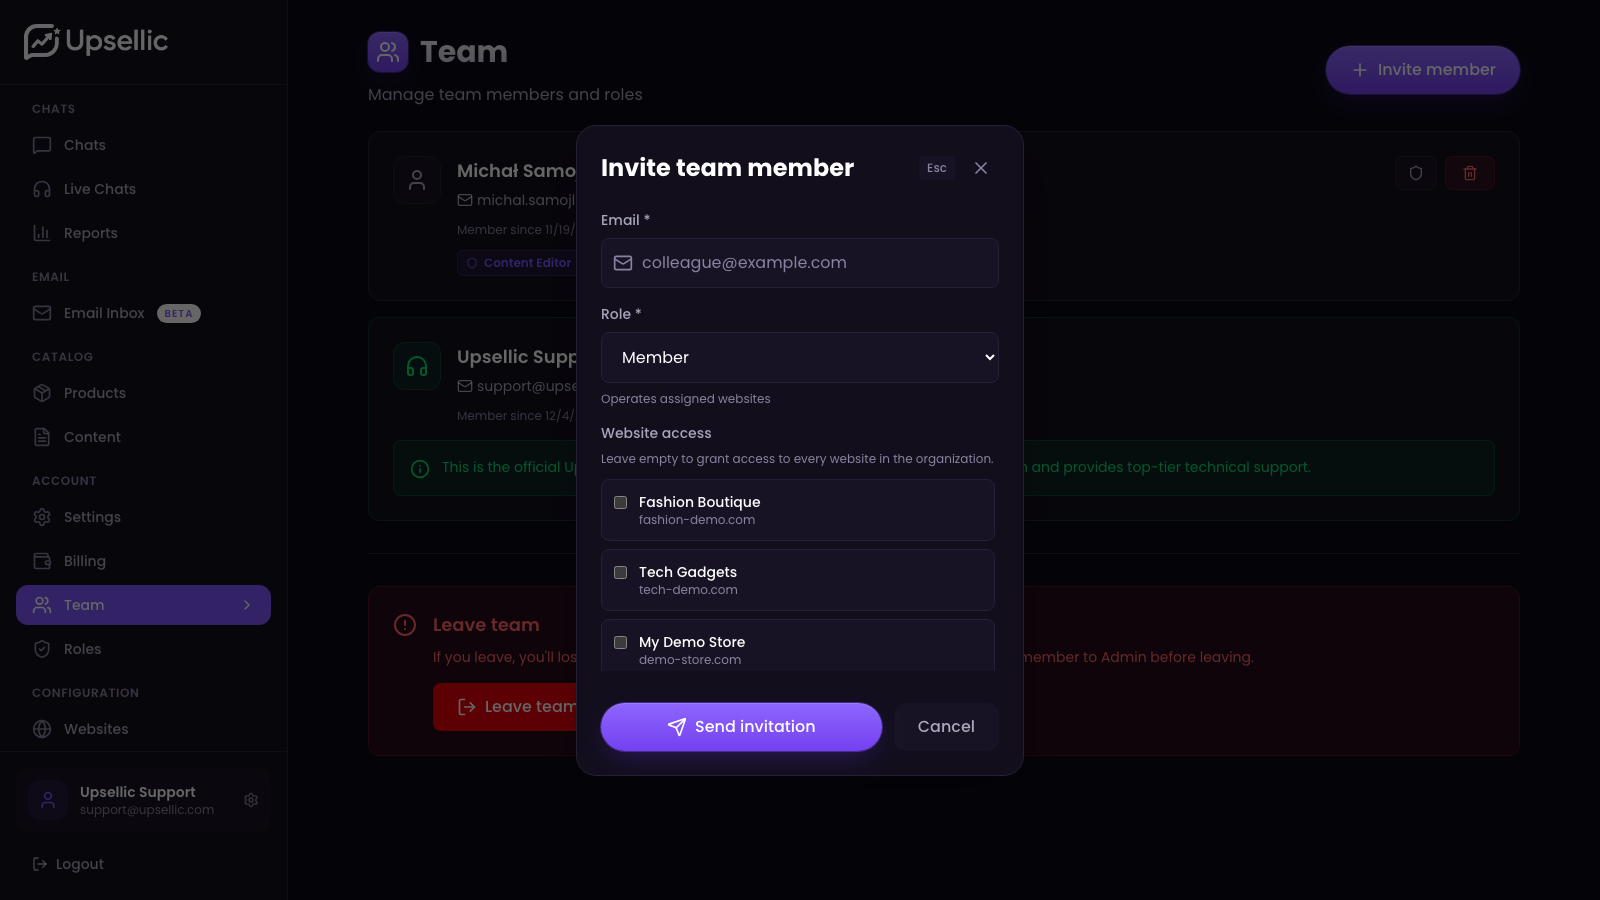
What the invitee gets
An email with a join link goes to the address you entered. Once they accept, the new member already has their role and website scope; there's nothing to set up a second time.
An invitation uses the same set of options as a role assignment: one role plus a website scope (empty = all).
Practical examples
A few common role setups worth starting from:
Chat support agent: read and write for chats and email inbox, read access to products and content. No access to settings, integrations, or billing. Assigned to the websites they cover.
Content editor: read and write for products and content, read access to reports. Perfect for someone who fills in descriptions and articles but doesn't configure the shop.
Analyst: read-only on reports, chats and products. Sees the numbers, changes nothing.
Shop manager: a broad set of website permissions (products, content, chats, feeds, widgets, themes, integrations), but limited to a single website.
Start with the smallest set of permissions someone needs and widen it as required. It's easier to grant more access than to explain where someone got too much.