How to Start with Upsellic
Complete step-by-step guide — from registration, through product import, to launching an AI chatbot on your website. The whole setup takes about 15 minutes.
Account Registration
To start using Upsellic, you need an account. The registration process is quick and does not require a credit card — every new account receives a free trial period.
Go to the registration page
Click the "Try for free" button on the homepage or navigate directly to the registration form.
Fill out the form
Enter your details and create a password. You can also sign up with one click using Google or LinkedIn. After registration, you will be automatically logged in and redirected to the dashboard.
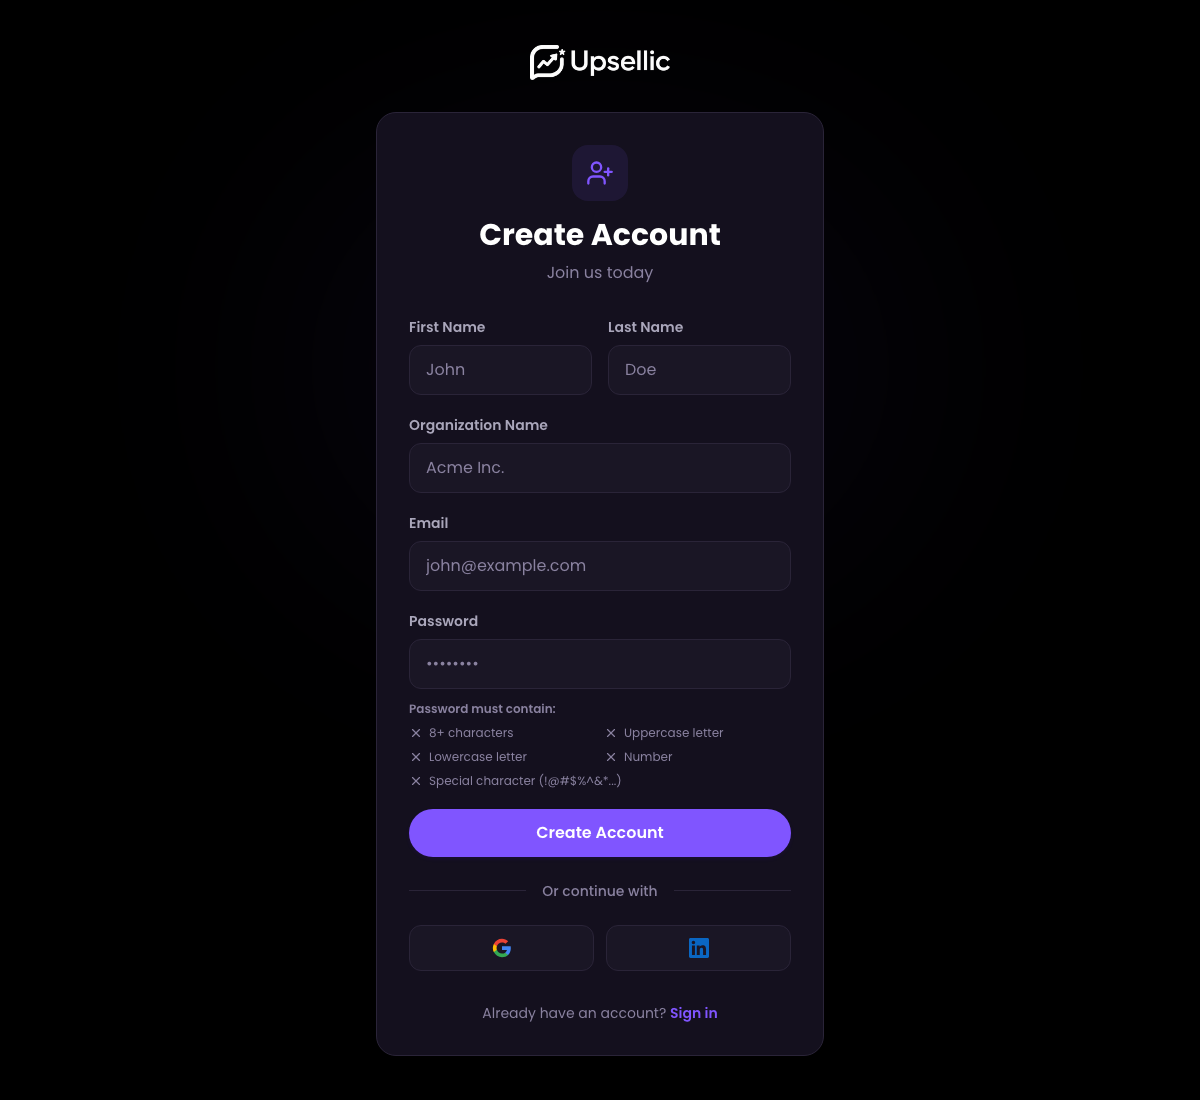
Registration does not require a credit card. The trial period includes 100 free AI conversations, allowing you to test all platform features.
Creating a Website
A website represents your online store in the Upsellic system. Each website has its own domain, product feeds, and chat widgets.
Go to the "Websites" section
In the sidebar menu, click Websites, then click the "Add website" button.
Fill in the website details
Enter your store name (e.g. "My Store") and domain (e.g. mystore.com). The domain is needed to verify that the widget is displayed only on your website.

Choose your e-commerce platform
Select the platform your store runs on from the list: Custom (WooCommerce, Magento, and others), Shopify, or BigCommerce.
You can add multiple websites to one account — for example, if you run several online stores. For language versions of the same store, do not create separate websites — instead, add a separate widget for each language.
Product Feed
A product feed is an XML file containing data about your products — names, descriptions, prices, images, specifications. This is what the AI chatbot uses to learn your product catalog and recommend products to customers.
Go to the "Feeds" section
In the sidebar menu, click Feeds, then click "Add new feed".
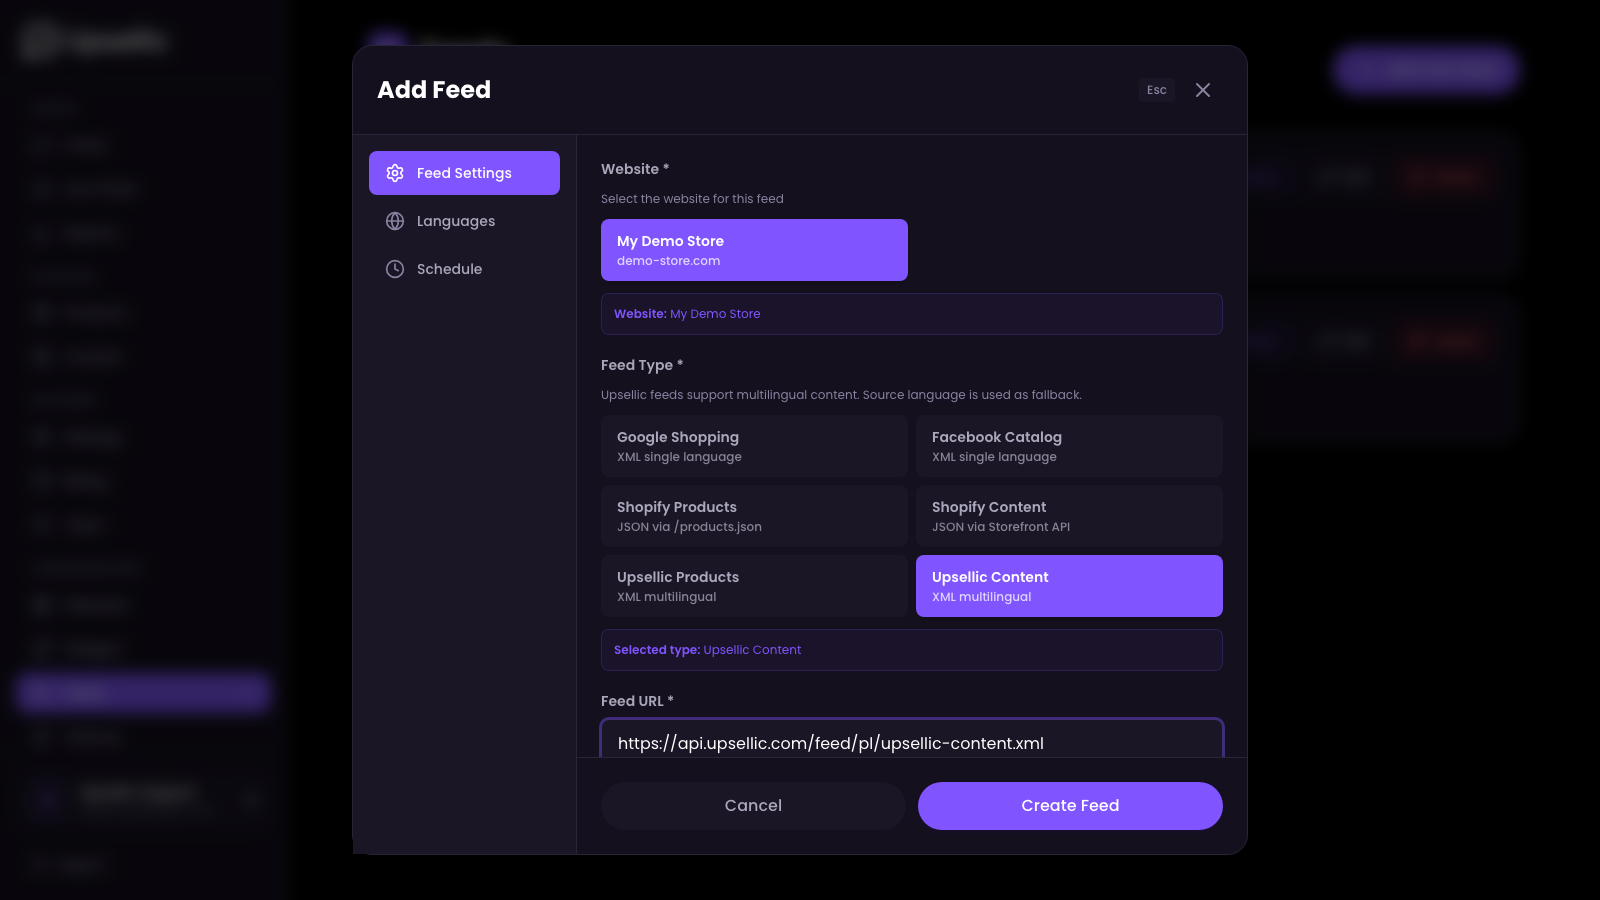
Choose a product feed type
Enter a name (e.g. "Products — My Store"), select your website, and paste the URL to your data source. Then choose one of the product feed types:
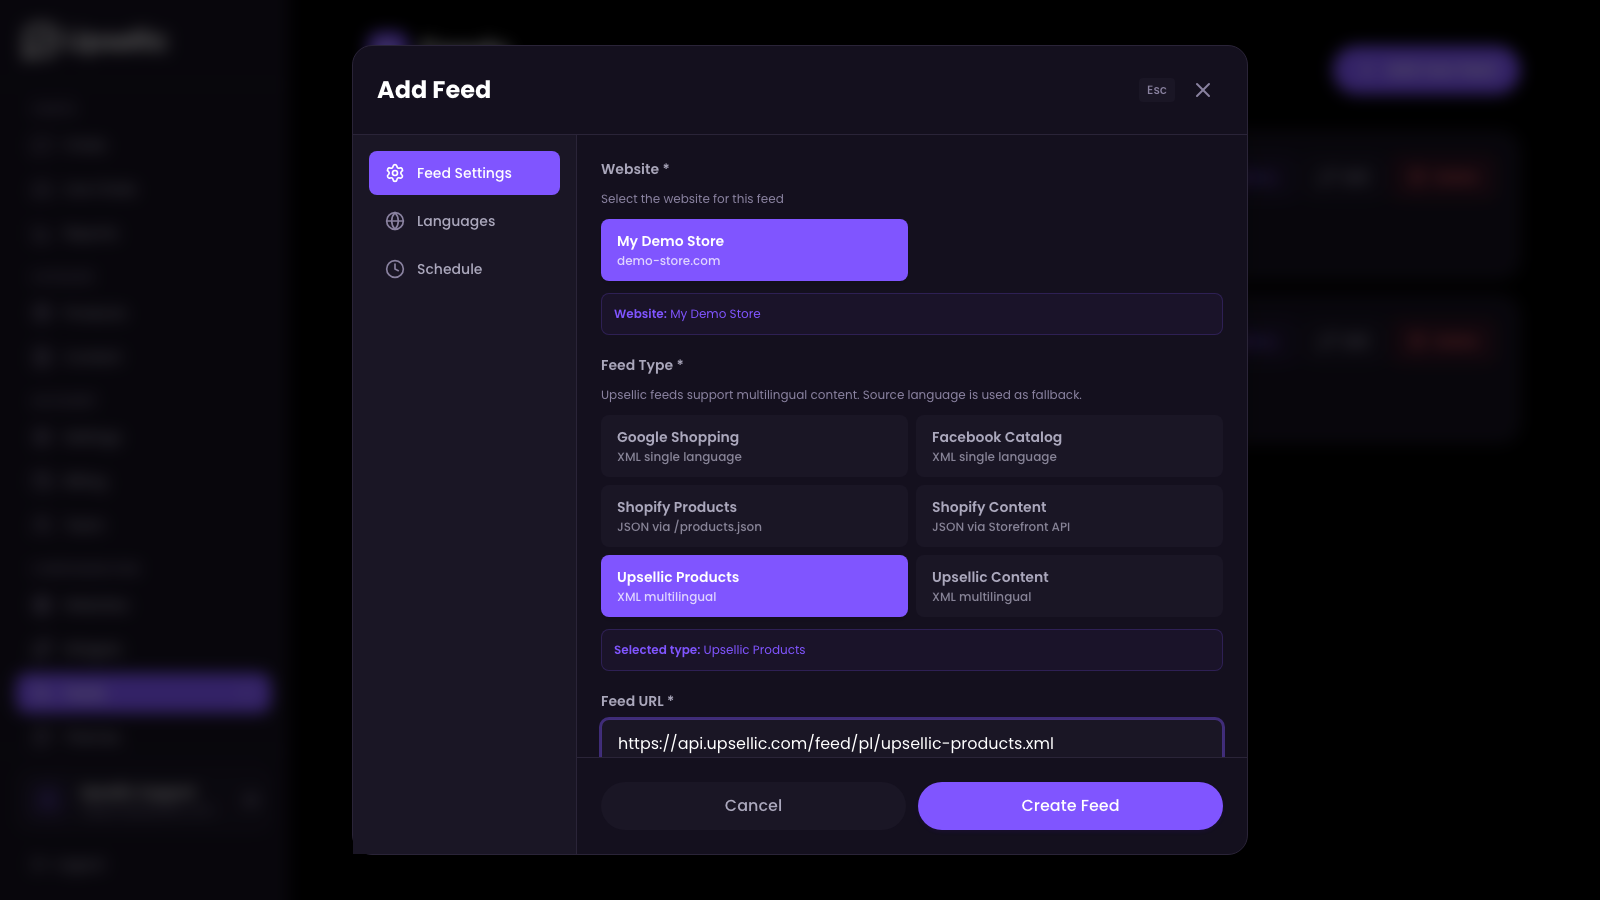
- Google Shopping — standard XML feed in Google Shopping format. Single-language — one feed per language.
- Facebook Catalog — XML feed in Facebook Catalog format. Single-language — one feed per language.
- Shopify Products — fetches products directly from your Shopify store's public products.json endpoint.
- Custom XML — Upsellic can map any custom XML structure to products. Configure field mapping in the visual editor.
- Upsellic Products — Upsellic's native XML format. The feed can be in any language — during import, content is automatically translated into all languages configured in your store's widgets.
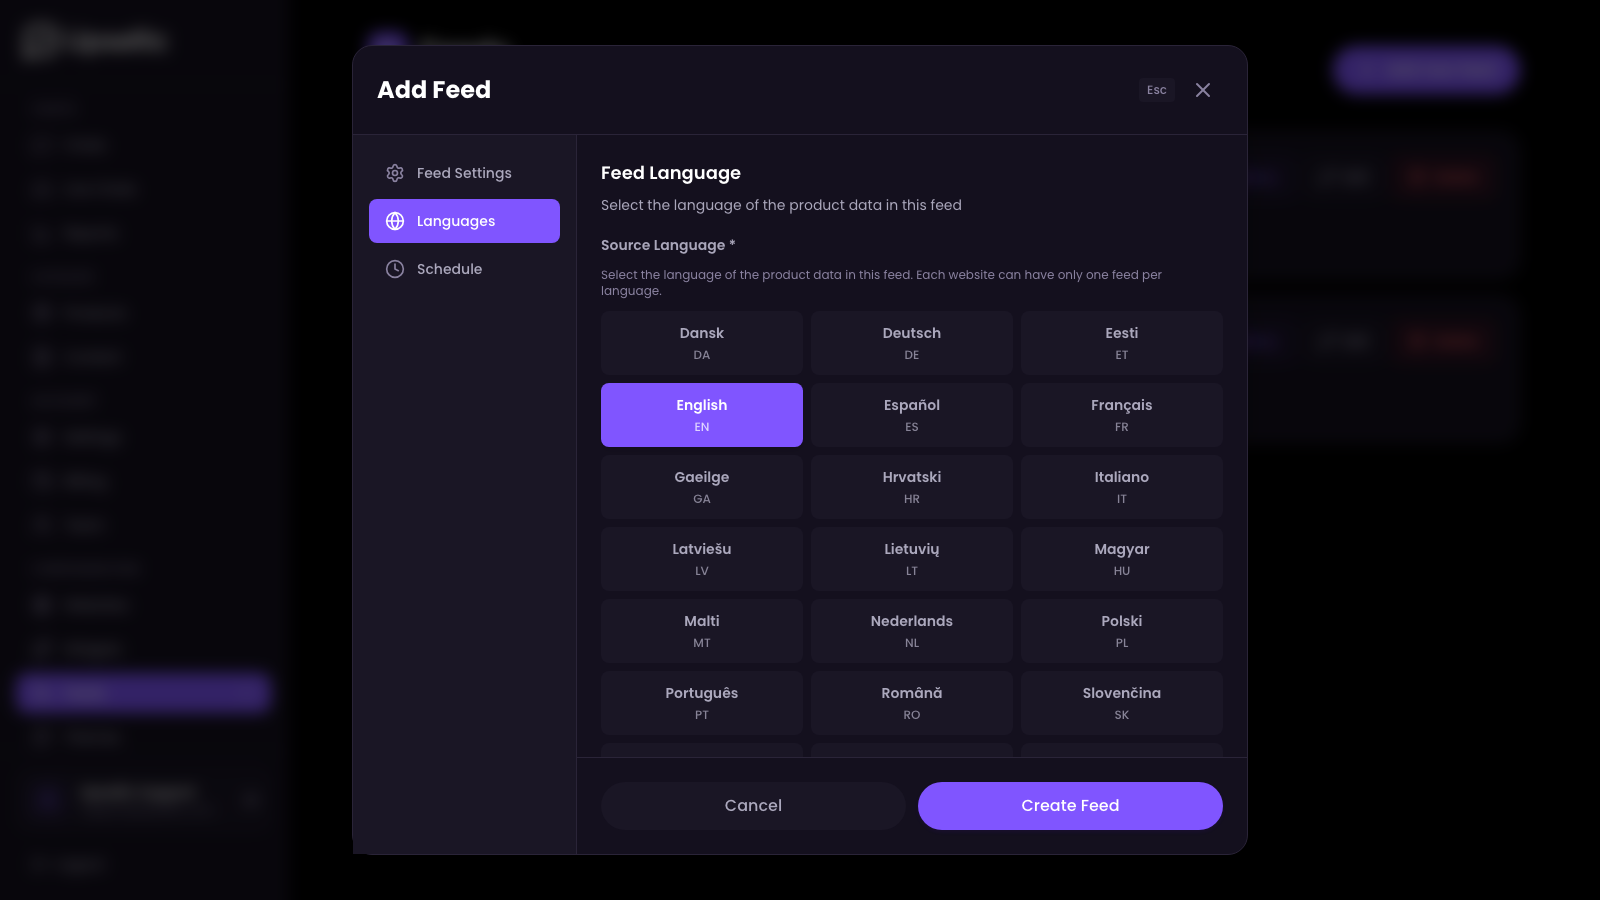
Select the feed language
In the Languages tab, select the source language of the data in the feed. Each website can have only one feed per language — this way the AI chatbot knows which language the product data is in.
Configure the import schedule
In the Schedule tab, you can set up automatic feed imports at specific times (GMT). This keeps your product data up to date without any manual effort — for example, every morning.
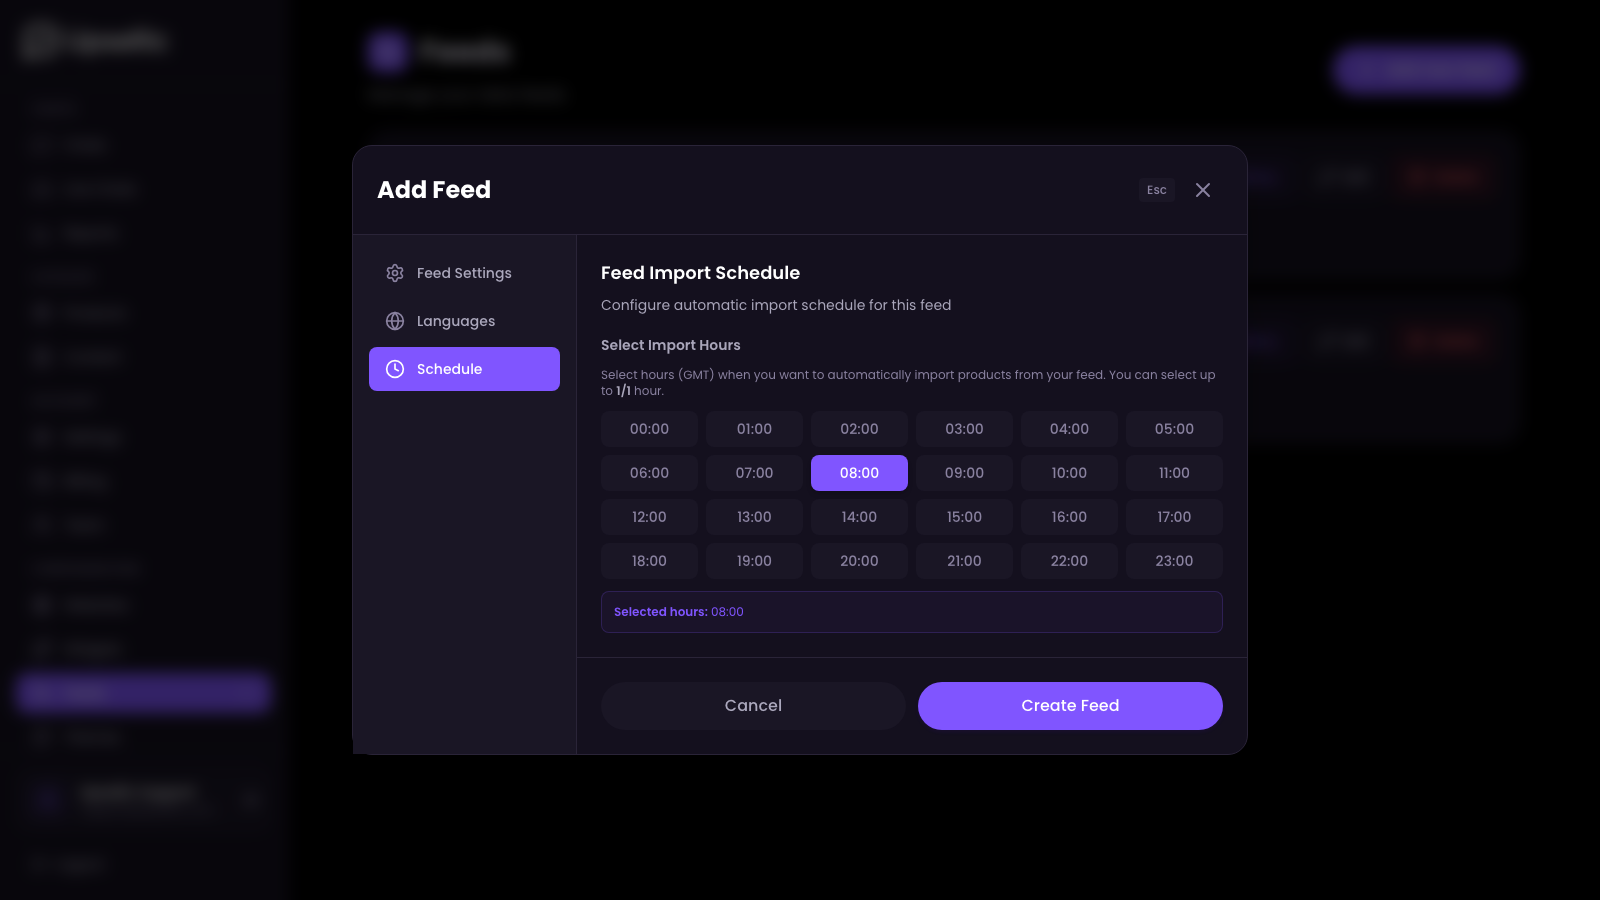
Save the feed
Click Create feed. The feed will be added to the list, but the import will not start automatically — you will trigger it manually in the next step.
Where to get a product feed?
- Shopify — select the "Shopify Products" type and enter your store address. The integration will fetch products automatically.
- Google Shopping / Facebook — if you already have an advertising feed, use its URL. Upsellic supports both formats natively.
- Other platforms — prepare an XML file according to the Upsellic specification (available in the documentation).
A product feed should contain at least: ID, title, description, price, currency, product URL, image URL, and availability. The more data you provide (categories, brand, specifications), the better AI will recommend products.
Content Feed
A content feed is optional but very valuable. It contains content such as information pages, FAQ, guides, blogs, or privacy policies. With it, the AI chatbot knows not only your products, but also the answers to your customers' most common questions.
Add a new feed
Just like with the product feed — go to Feeds → "Add new feed".
Choose a content feed type
Enter a name (e.g. "FAQ and Guides"), select your website, and paste the URL to your data source. Then choose one of the content feed types:
- Sitemap — automatically scans your website's sitemap and identifies content pages using AI. No CSS selectors needed — Upsellic extracts content automatically.
- Upsellic Content — Upsellic's native XML format for importing FAQ pages, guides, and blog articles. The feed can be in any language — content is automatically translated into all languages of your store's widgets.
Select the language and schedule
Just like with the product feed — in the Languages tab, select the source language of the content, and in the Schedule tab, set up automatic imports.
What should you include in a content feed?
- FAQ — frequently asked questions and answers
- Return policy — information about returns, complaints, warranties
- Shipping — delivery methods, costs, fulfillment times
- Guides and blogs — product articles, shopping advice
A content feed is optional but highly recommended. An AI chatbot that knows the answers to questions about shipping, returns, and policies is much more helpful for customers and reduces the workload of your support team.
Running the Import
After adding feeds, you need to run the import so that Upsellic can download data from your XML files, process it, and index it for semantic search. This is a crucial step — without the import, the AI chatbot will not know your products.
Open the feed list
On the feed list, you will see your added feeds. Each one has a "Run import" button next to it.
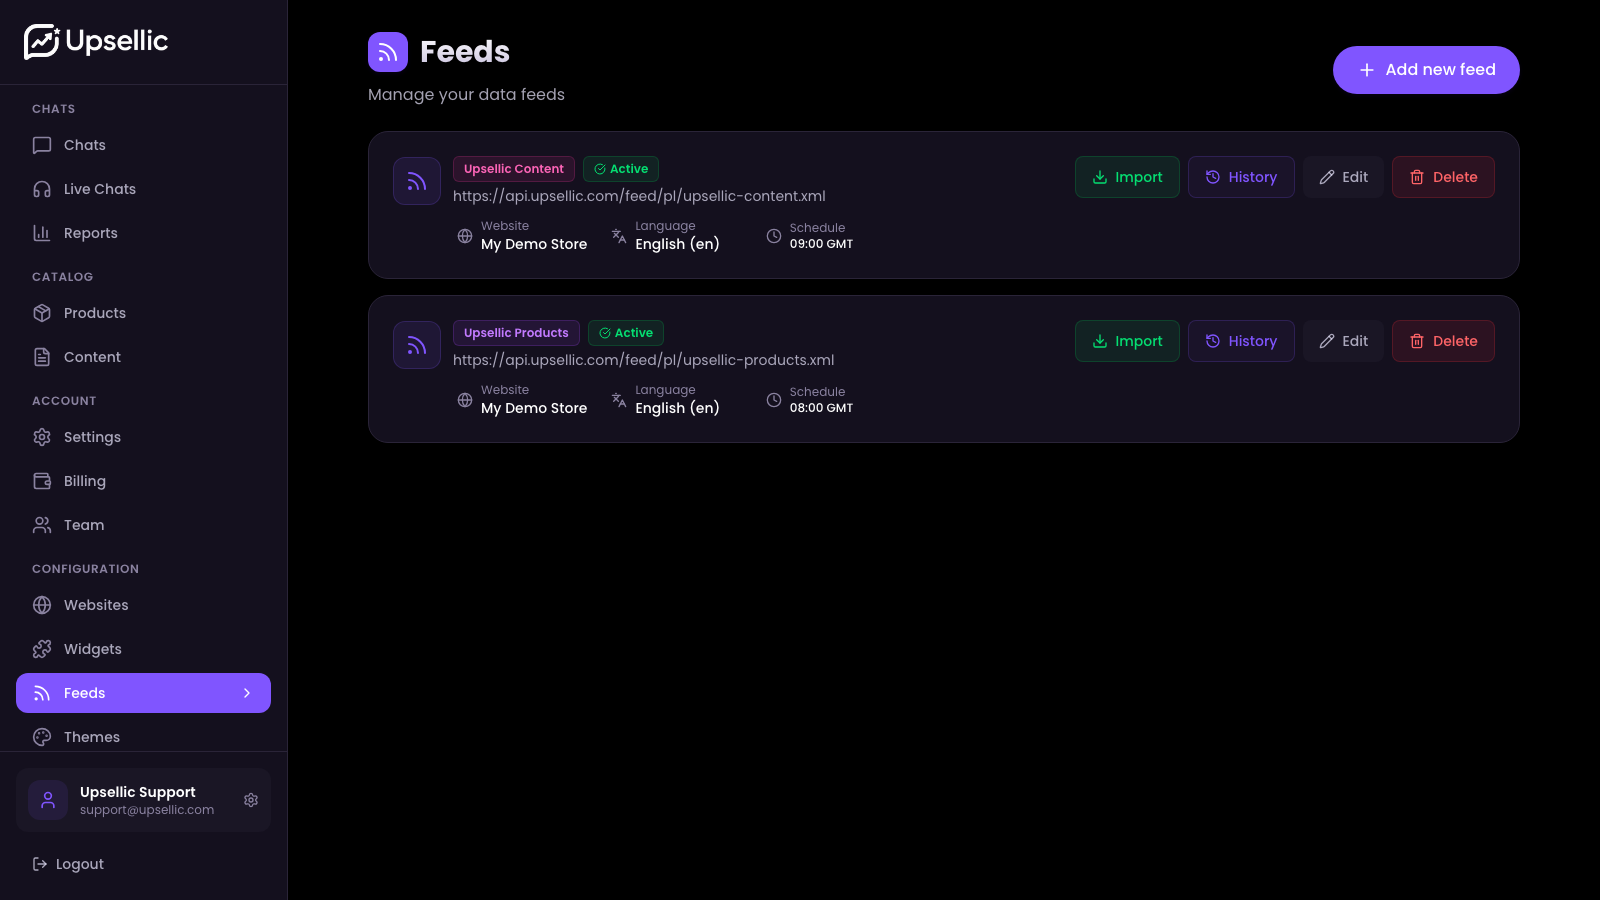
Click "Run import"
Run the import for each feed separately. The system will download the data, process it, optimize it for AI, and prepare translations. Import progress is displayed in real time.
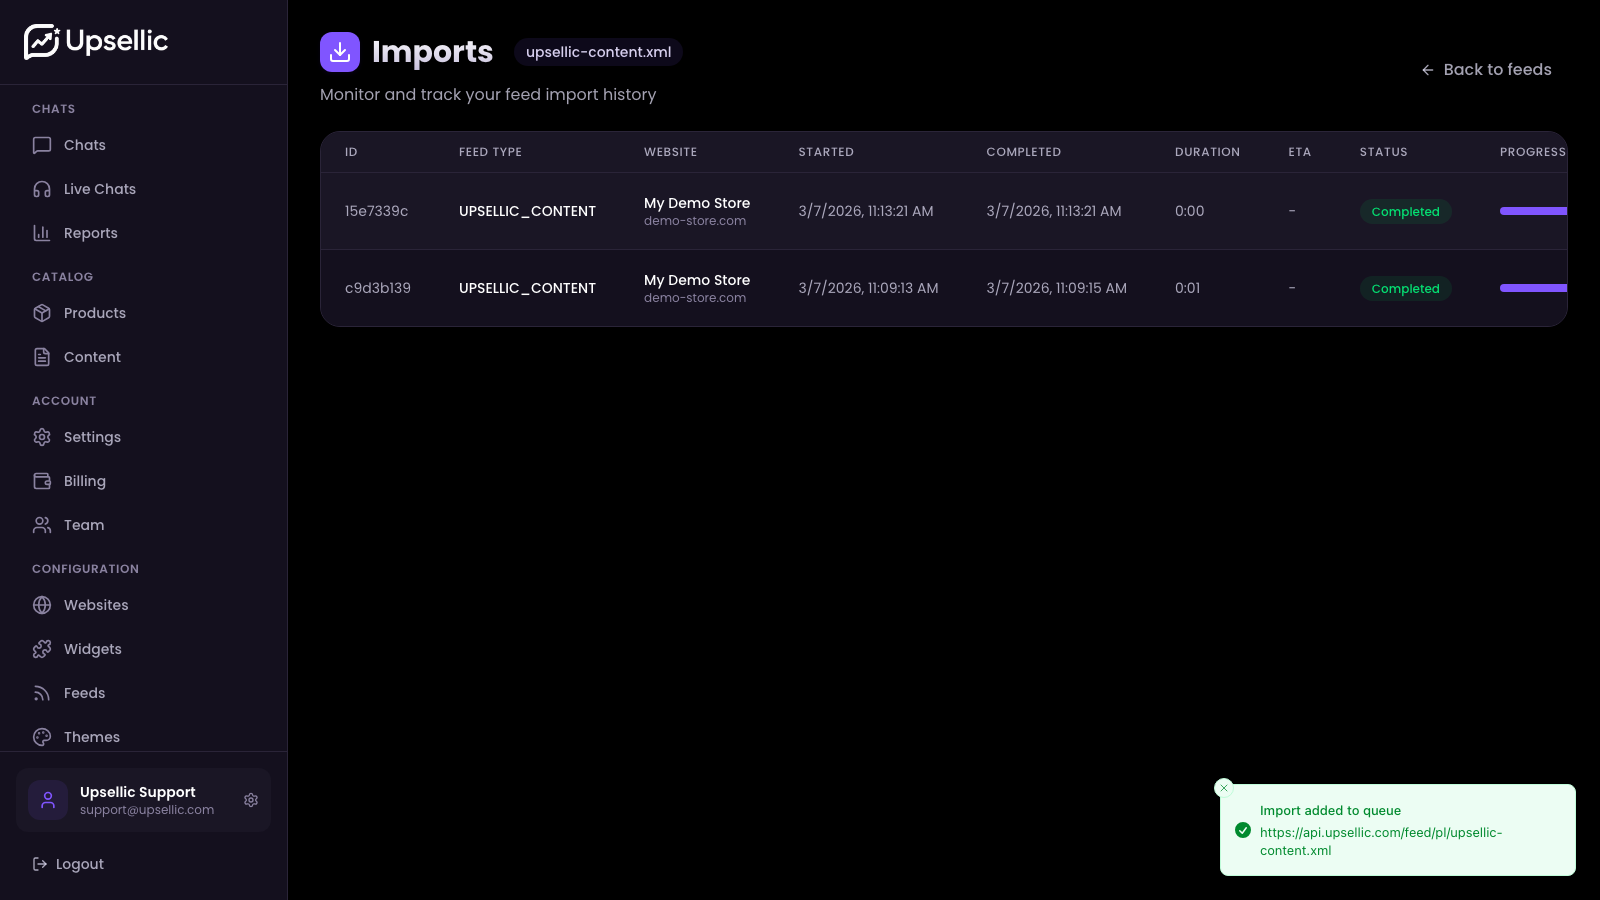
Wait for it to finish
Shortly after starting the import, you will see an estimated completion time in the ETA column. Once finished, a summary will appear — showing how many products or content items were imported.
The first import requires AI optimization and translation preparation for every product and content item, which may take longer. Subsequent imports (updates) are much faster because only changed data is processed.
After a successful import, you can go to the Products section in the dashboard to see all imported products with their images, prices, and descriptions. Imported content items can be found in the Content section.
Creating a Widget
A widget is an AI chat window that will appear on your website. This is where your customers will talk to an assistant that knows your products and can answer their questions.
Go to the "Widgets" section
In the sidebar menu, click Widgets, then click Add widget.
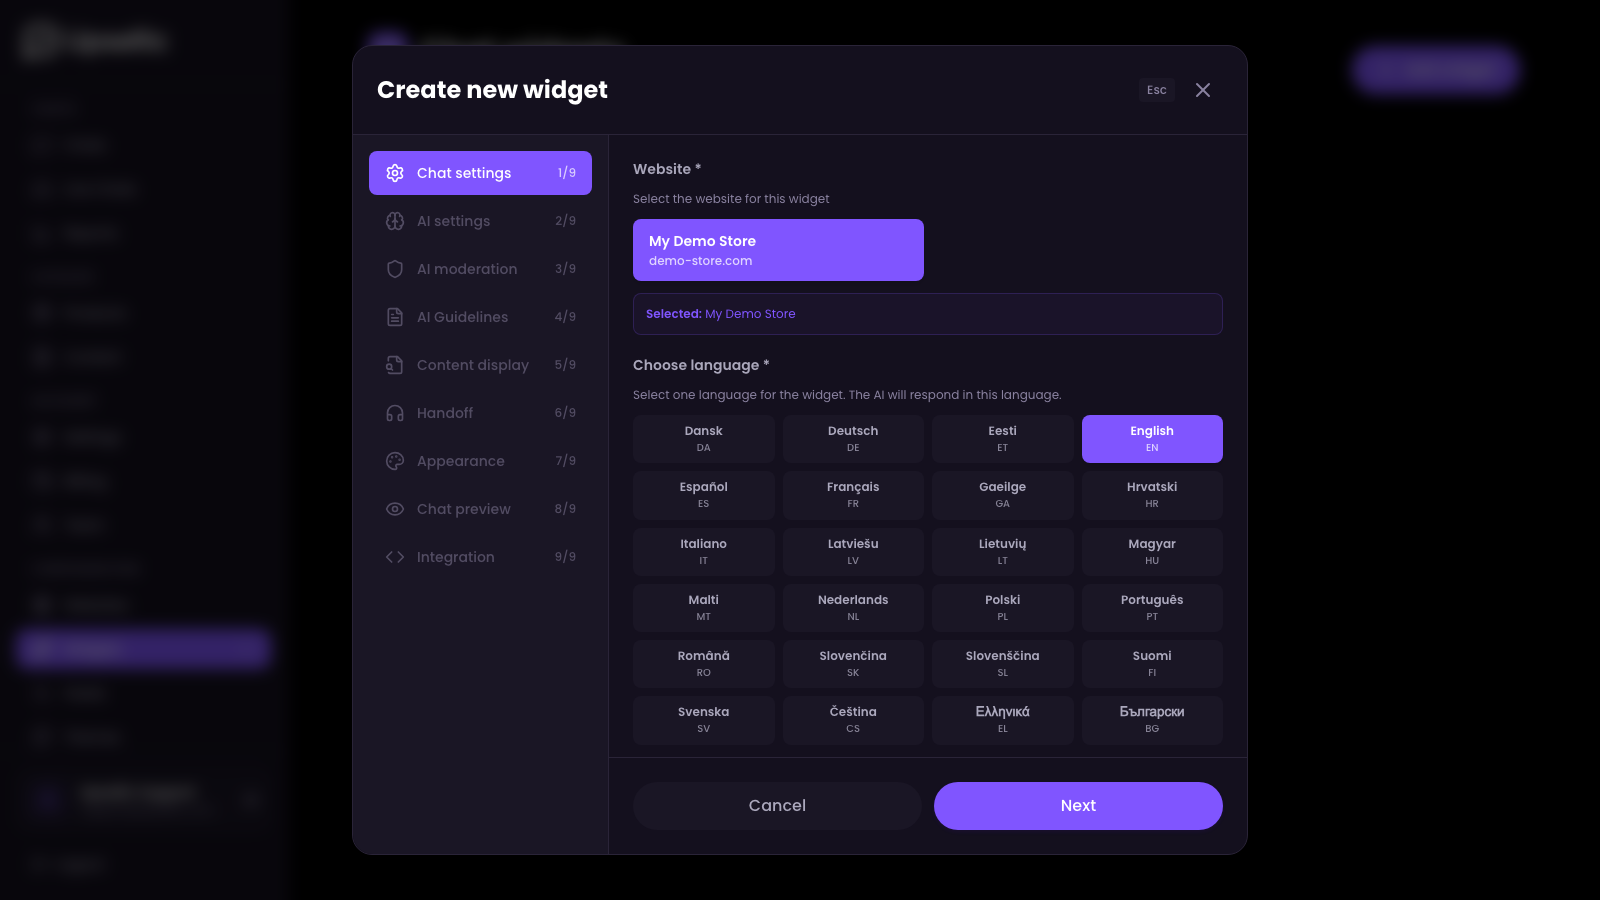
Choose a website and language
Select the website you are assigning the widget to and the interface language (e.g. English). The language affects button labels, system messages, and default text in the chat window.
Configure chat settings
In the Chat settings tab, fill in:
- Button text — the label on the button that opens the chat (e.g. "Chat with AI")
- Chat title — the heading displayed at the top of the chat window
- Subtitle — a short description below the heading (e.g. "Your shopping assistant")
- Welcome message — the first message from the assistant at the start of a conversation
- Goodbye message — the message displayed when the conversation ends
The widget language cannot be changed after creation. If your store operates in multiple languages, create a separate widget for each language.
The welcome message is the first thing your customer will see — keep it short, inviting, and informative about what the assistant can do.
AI Settings
This is one of Upsellic's most powerful features — you can precisely define how the AI chatbot communicates with your customers. The AI configuration is split into two tabs: AI Settings (personality and style) and AI Guidelines (detailed instructions).
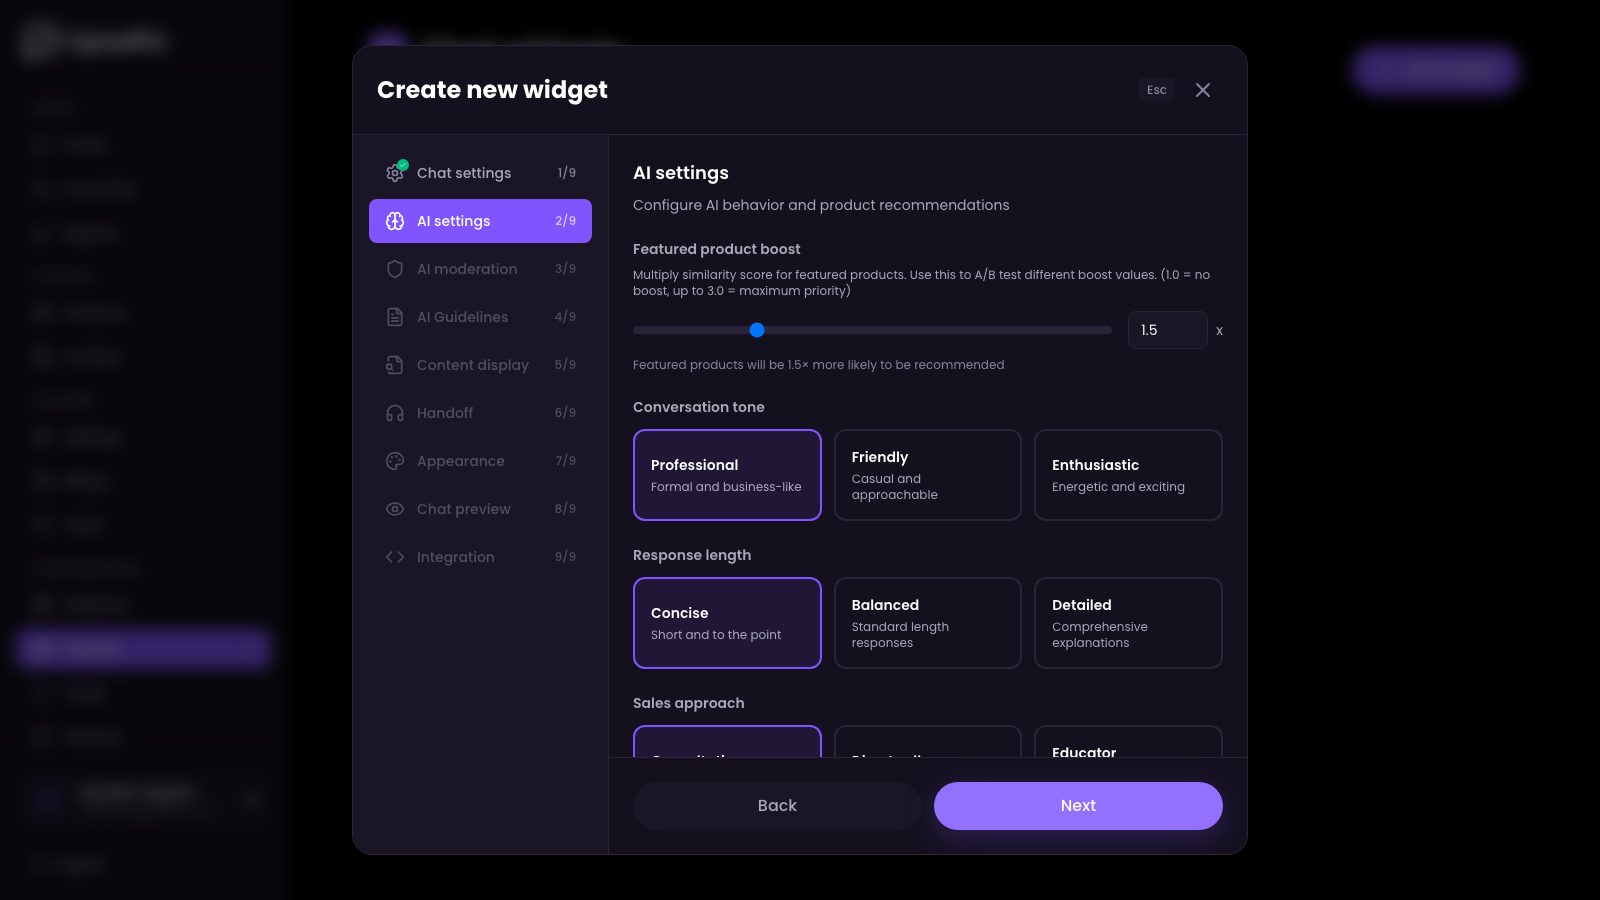
AI Settings tab
Featured product boost — a slider from 1.0 to 3.0, a similarity score multiplier for featured products. A value of 1.0 means no boost, while 3.0 gives maximum priority.
Communication tone — choose one of three styles:
- Professional — factual, formal tone for premium brands and B2B
- Friendly — warm, natural conversational style
- Enthusiastic — energetic, passionate communication style
Response length — decide how detailed the assistant's responses should be:
- Concise — short, to-the-point answers (1-2 sentences)
- Balanced — moderate length (2-4 sentences)
- Detailed — full explanations with context
Sales approach — define how actively AI should recommend products:
- Consultative — gentle suggestions, focus on helping
- Direct seller — actively proposing products
- Educator — product explanations and comparisons
Brand voice and target audience — select tags that describe your brand values (e.g. Innovation, Sustainability, Luxury) and define your target audience. AI will adjust its language accordingly.
AI Guidelines tab
Enter detailed instructions for the AI assistant in four categories:
- General guidelines — basic company information, e.g. contact details, business hours, return policies
- Product guidelines — instructions for recommendations, e.g. "Prioritize recommending new arrivals"
- Content guidelines — how to use articles, e.g. "Link to the size guide when customers ask about sizing"
- Mixed guidelines — combining products and content, e.g. "When recommending a product, also link to a related article"
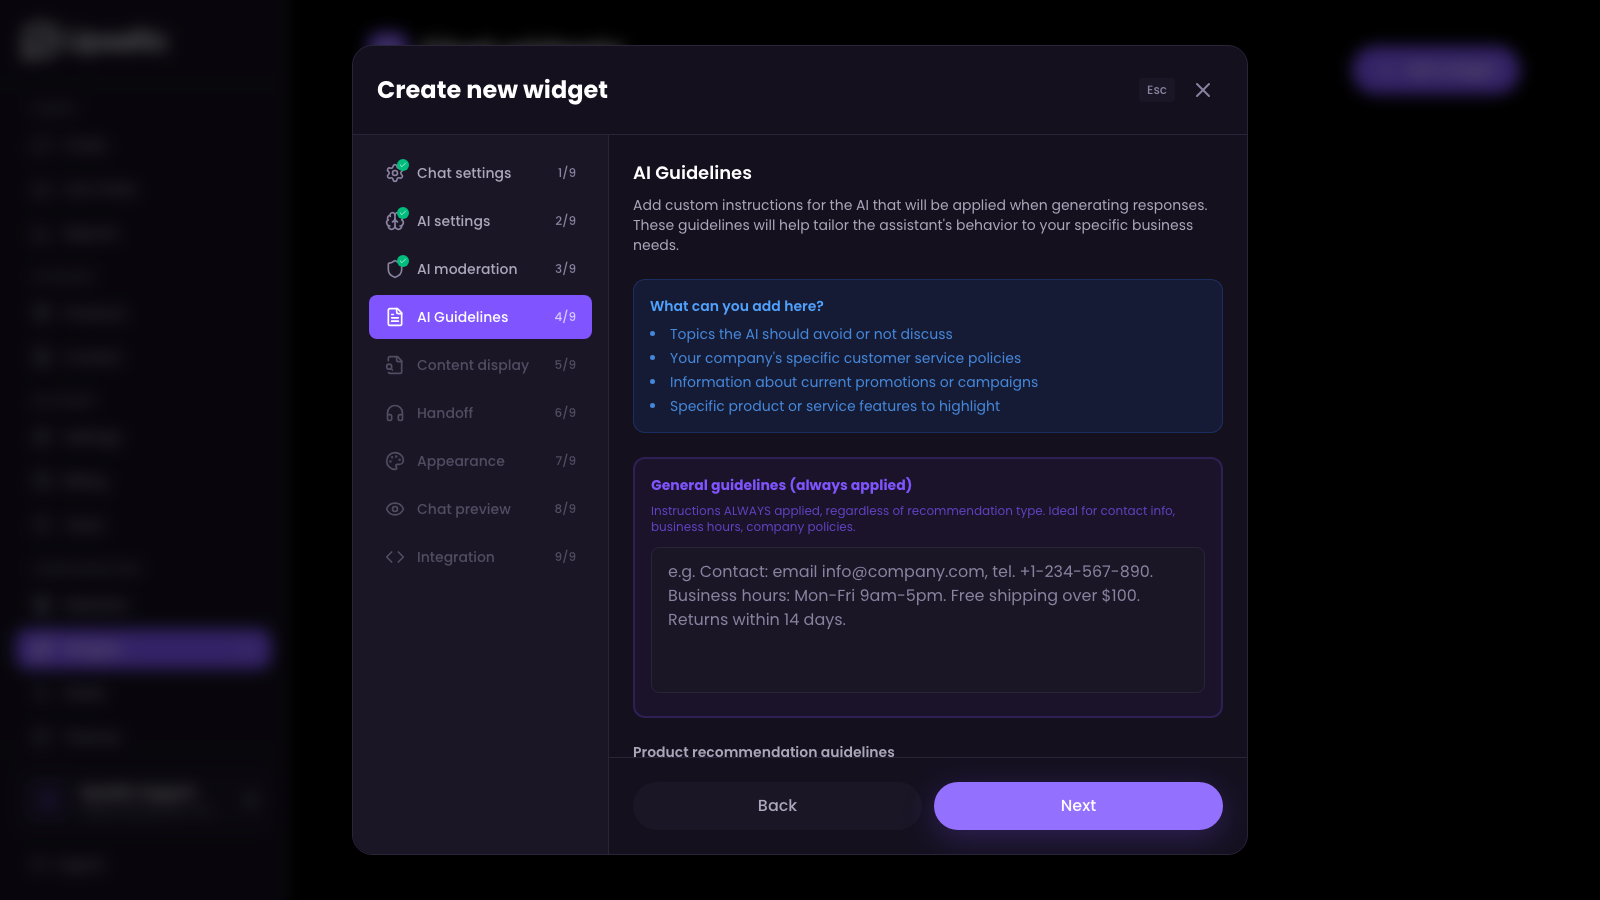
You don't need to fill in all guidelines right away. Start with the general ones, and over time add detailed instructions based on how customers use the chat.
Appearance and Customization
The Upsellic widget can be fully customized to match your store's visual identity.
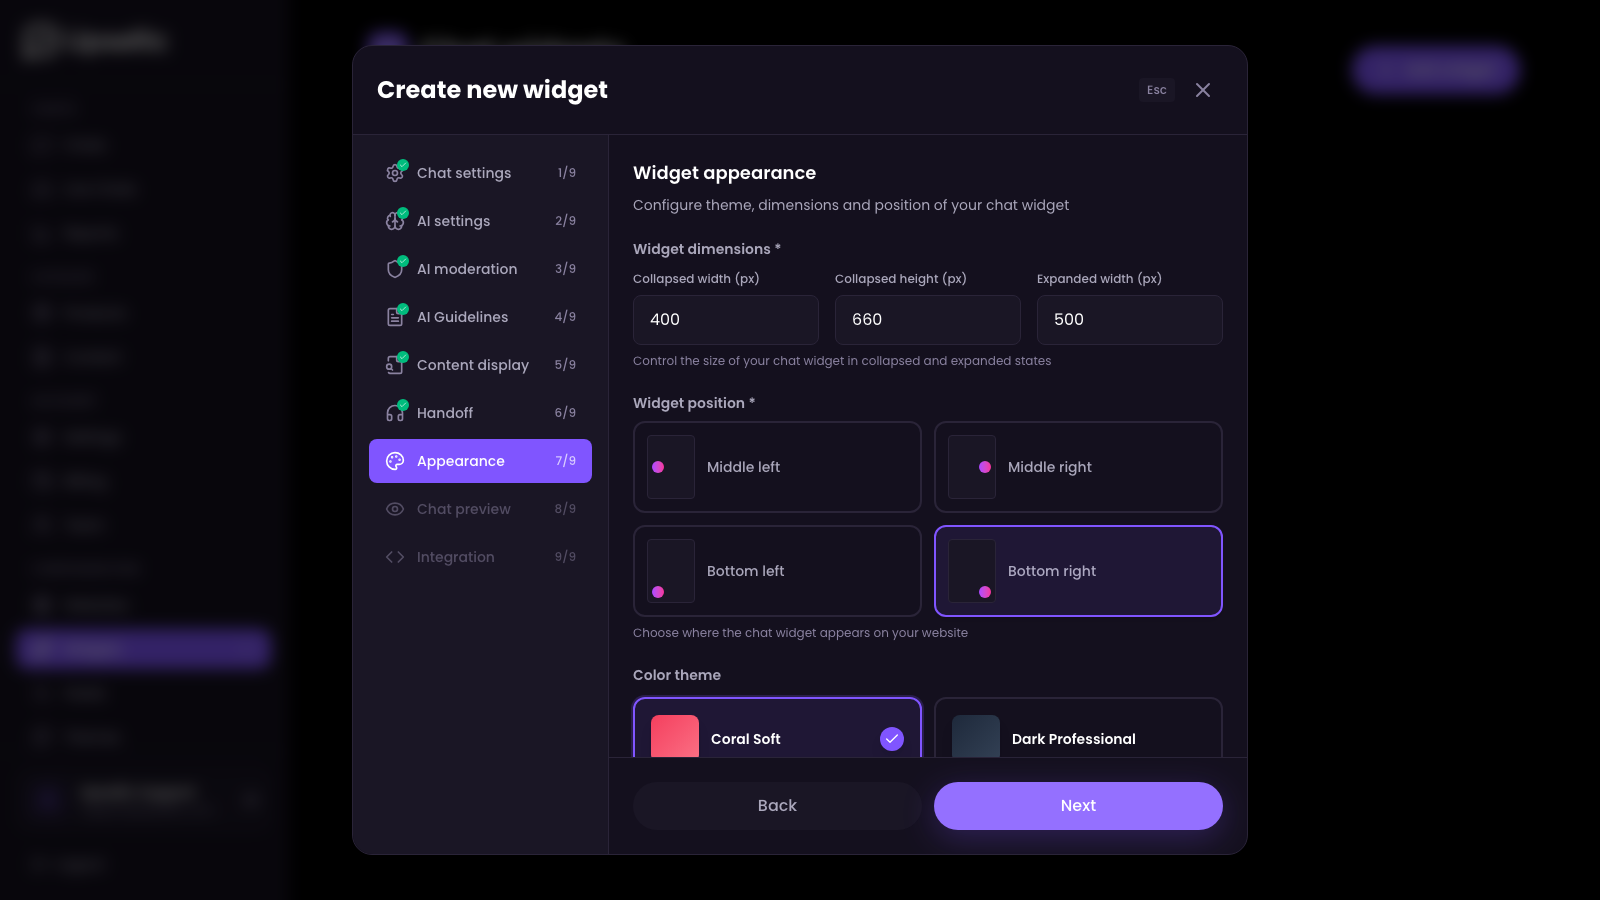
Appearance tab
- Chat window sizes — set width, height, and expanded width
- Position on the page — bottom-right (default), bottom-left, right center, or left center
- Color theme — choose from ready-made themes or create a custom one in the Themes section
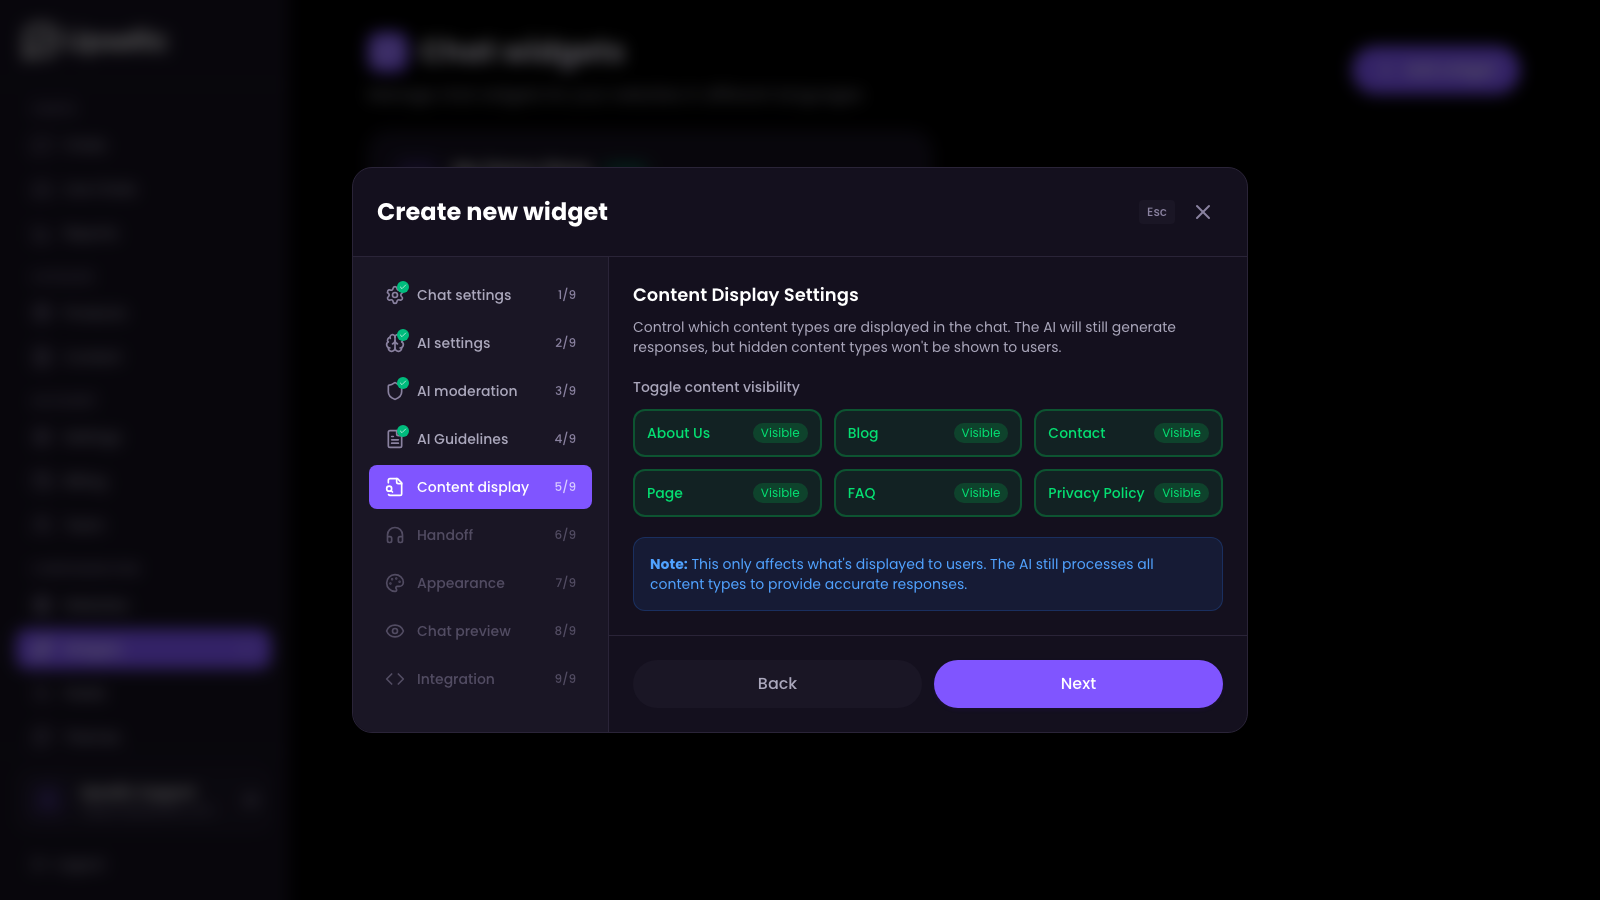
Content Display tab
Decide which content types should be visible in the chat window. The list is generated dynamically based on your imported content — you only see categories that exist in your feed (About us, FAQ, Blog, Contact, etc.).
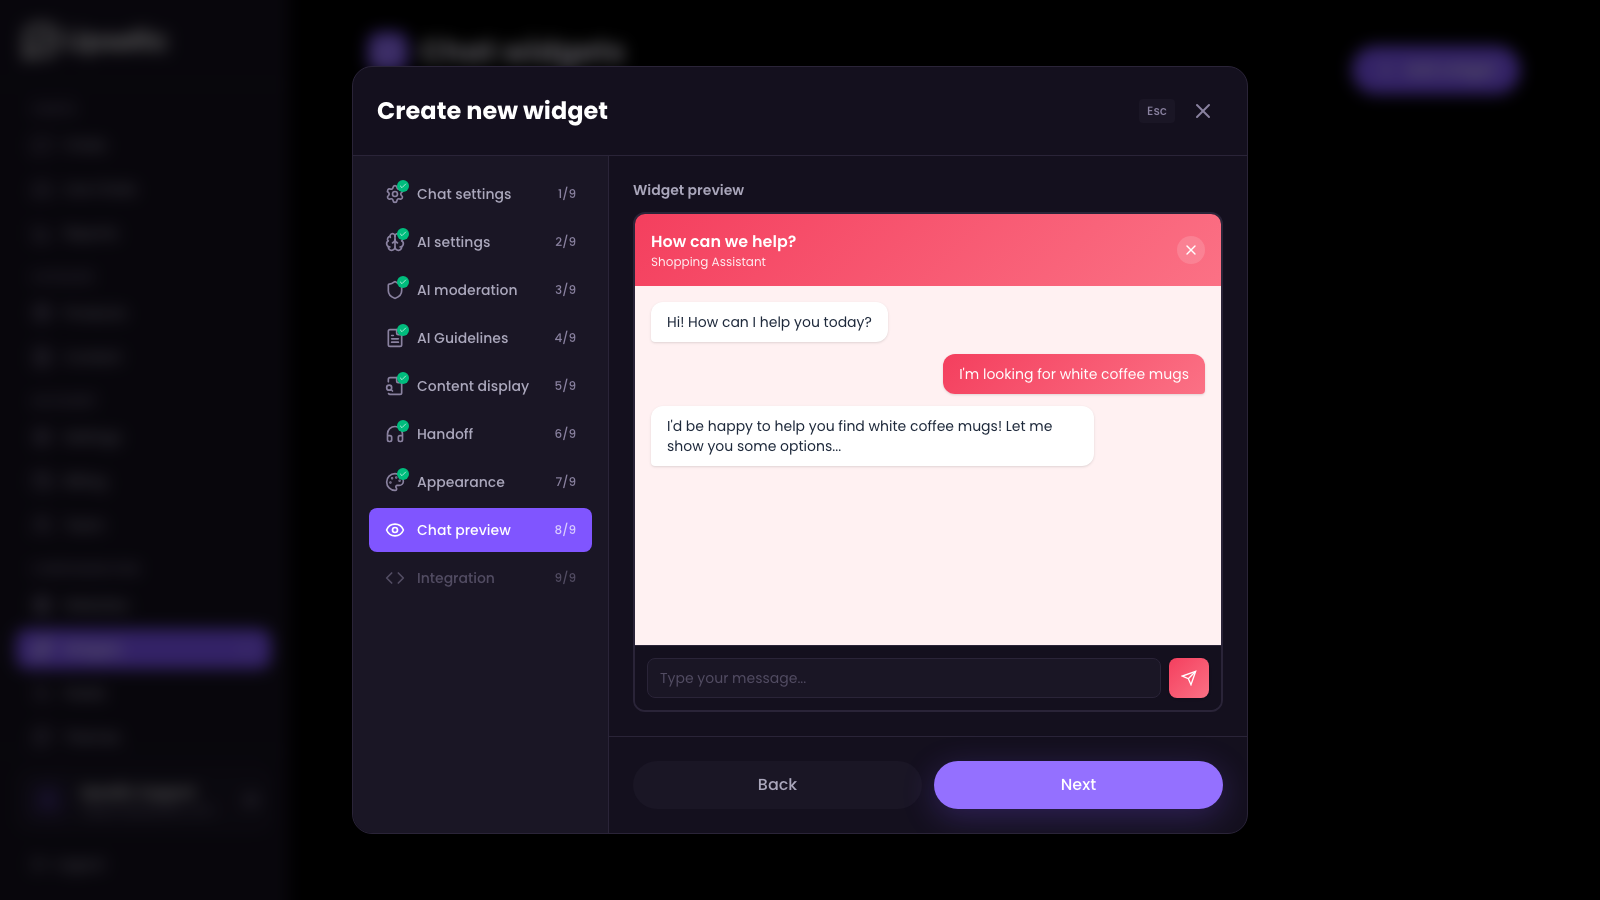
Chat Preview tab
See a live preview of your widget with current colors, text, and settings before publishing.
If you have imported content but don't want to show it in the chat — simply turn off the corresponding toggle. The AI will still have access to that knowledge, but it won't link to those pages.
Advanced Settings
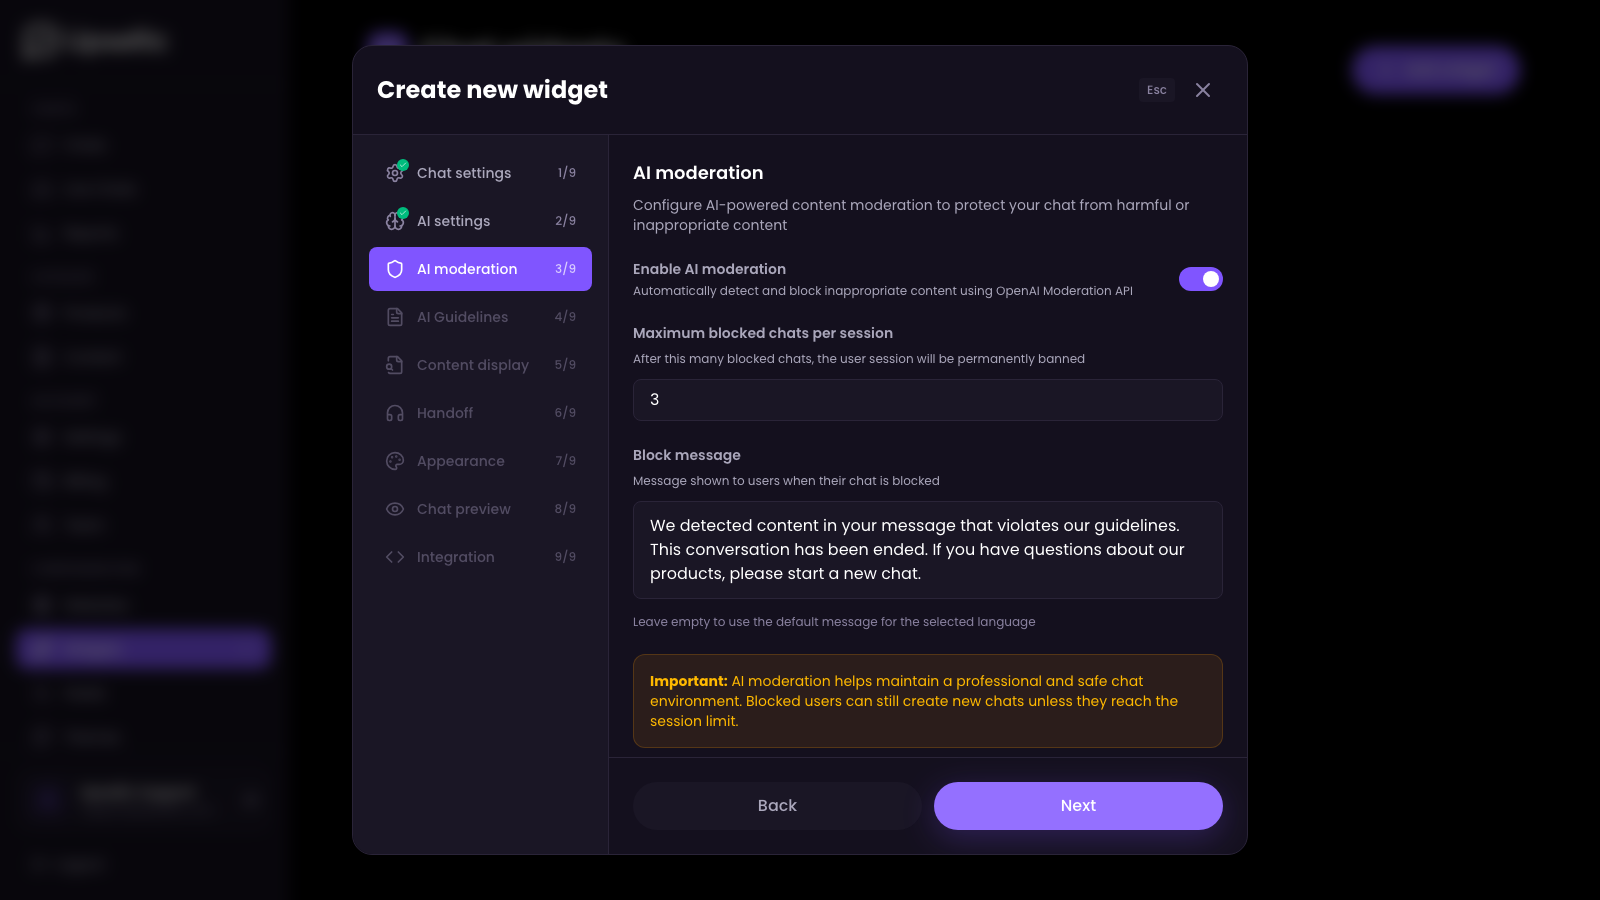
AI Moderation
- Enable/disable moderation — activate automatic content moderation to block inappropriate messages
- Blocked chat limit — maximum number of blocked messages per session before the user is fully blocked
- Block message — text displayed when a message is blocked
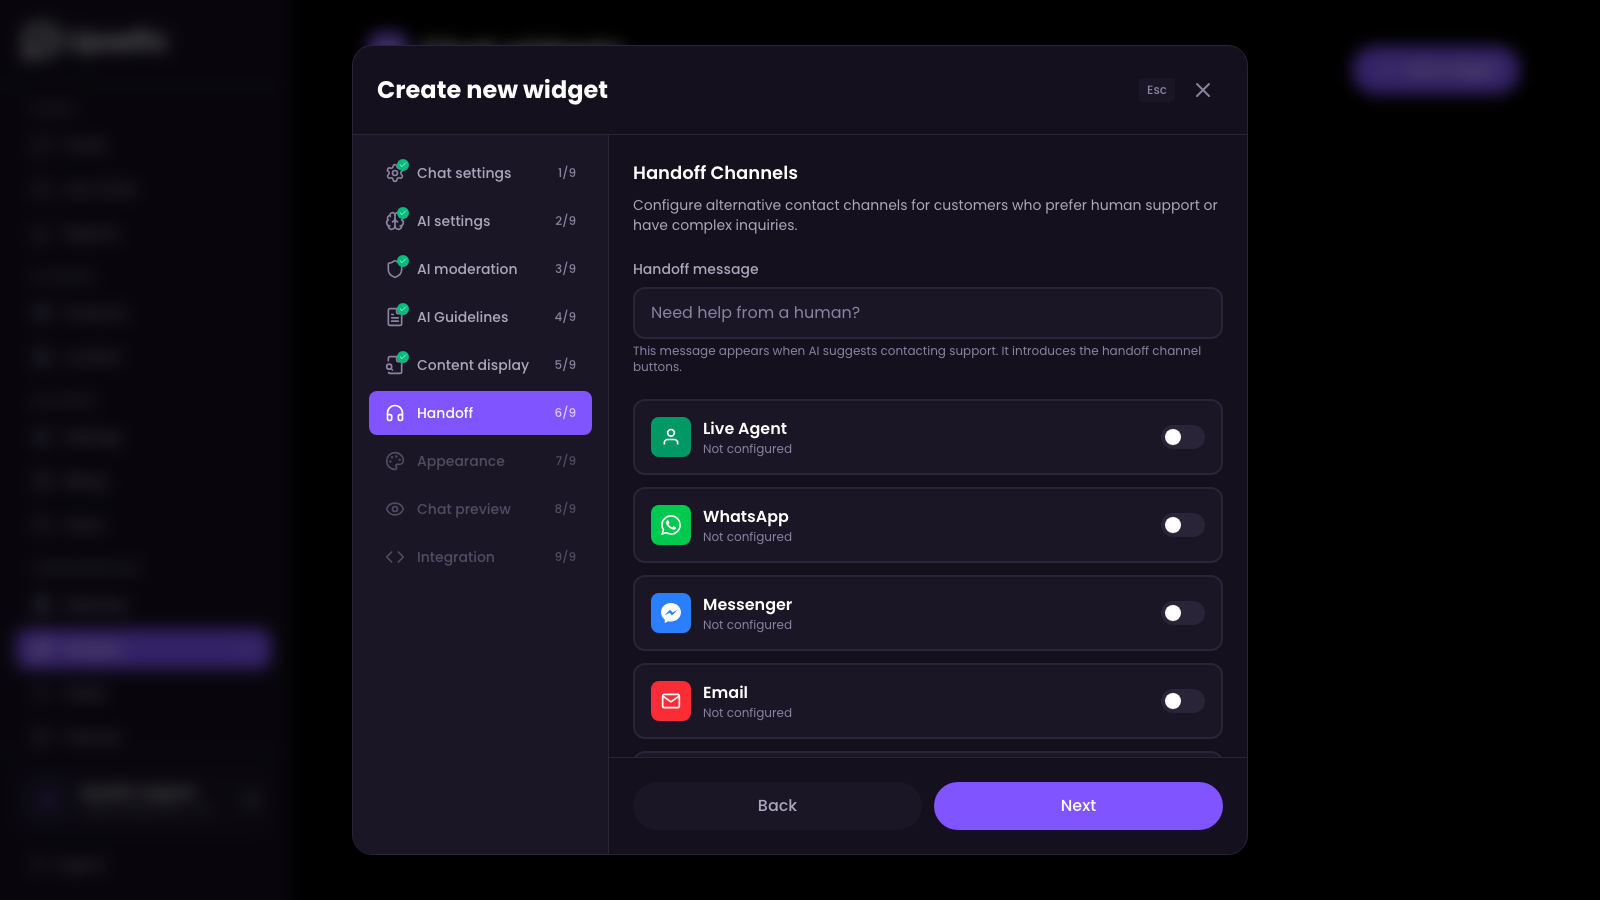
Redirect (Handoff)
Configure what happens when the AI is unable to help or the customer asks for human support:
- Redirect message — text shown when AI suggests contacting support
- Contact channels — activate the channels your team supports:
- Live Agent — live conversation in the chat window
- WhatsApp — redirect to WhatsApp
- Messenger — redirect to Facebook Messenger
- Email — email contact
- Phone — phone number
- Contact form — link to your website's form
Enable only the channels you actually support. Usually, email and one additional channel (e.g. phone or WhatsApp) are enough.
Installing the Widget
The final step — adding the chat widget to your website.
Copy the installation code
In the widget panel, you will find a ready-to-use code snippet containing your widget identifier.
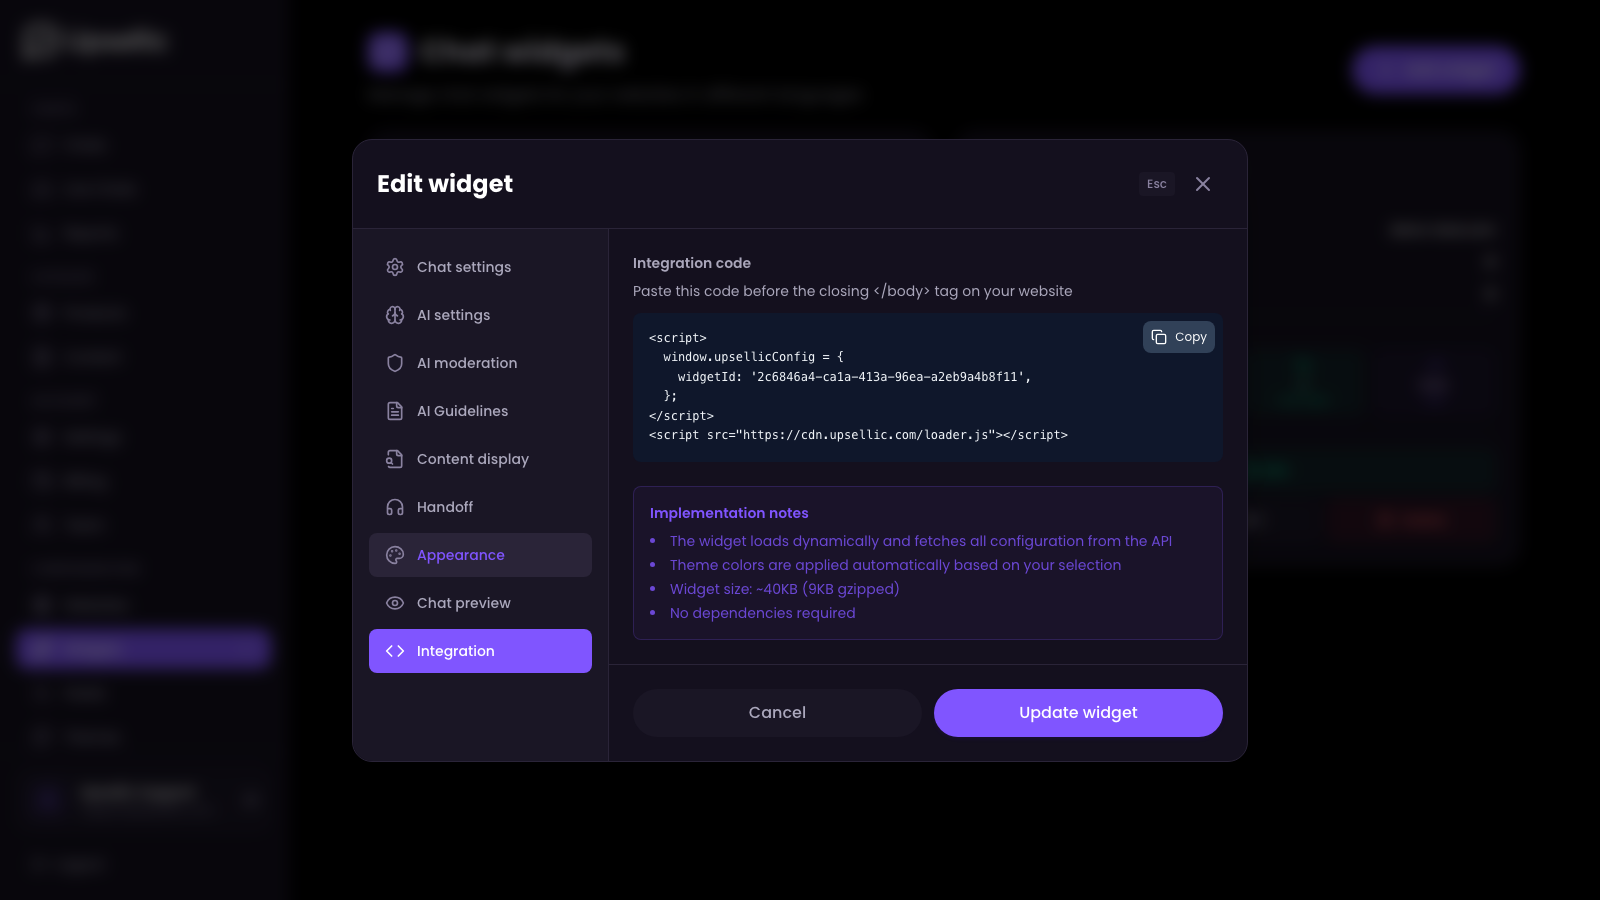
Paste the code on your website
Paste the copied code right before the closing </body> tag in your website's template.
Installation on popular platforms
- Shopify — widget code is embedded automatically through native integration, no manual editing required
- BigCommerce — widget code is embedded automatically through native integration
- WooCommerce — Appearance → Theme Editor → footer.php → paste before
</body> - Google Tag Manager — create a "Custom HTML" tag and paste the widget code
Check that it works
Open your website in a browser. The chat button should appear in the chosen corner. Click it to test a conversation with the AI assistant.
If you have trouble with installation, contact us — we are happy to help!
Congratulations!
Your AI sales assistant is ready to go. Monitor conversations and statistics in the Upsellic dashboard to track the chatbot's performance and optimize its behavior.